In this simple step-by-step guide, we show you how to add a favicon to your Squarespace website.
A favicon — short for ‘favorites icon’ — is a small image associated with a particular website that displays at the top of a web browser tab.

And while favicons are really rather tiny — appearing at a size of just 16px by 16px in most web browsers — there are several benefits to adding one to your Squarespace site.
Adding a favicon to your Squarespace site can:
- help you present a professional and consistent brand image
- help your users locate your site when they have multiple browser tabs open
- make your site stand out in search results.
It’s also worth mentioning that if you don’t add your own favicon, Squarespace will automatically display its default favicon on your site (see screenshot below).

So there is really no good reason why you shouldn’t use this small but significant piece of browser real estate to promote your own brand!
And the good news is it’s really easy to add a favicon in Squarespace.
Here’s how you do it…
Step 1 — Create your favicon
You can use your graphic design tool of choice to create the favicon for your Squarespace site. For the purposes of this demonstration, I’ll show you how to create a favicon using the popular design tool Canva.
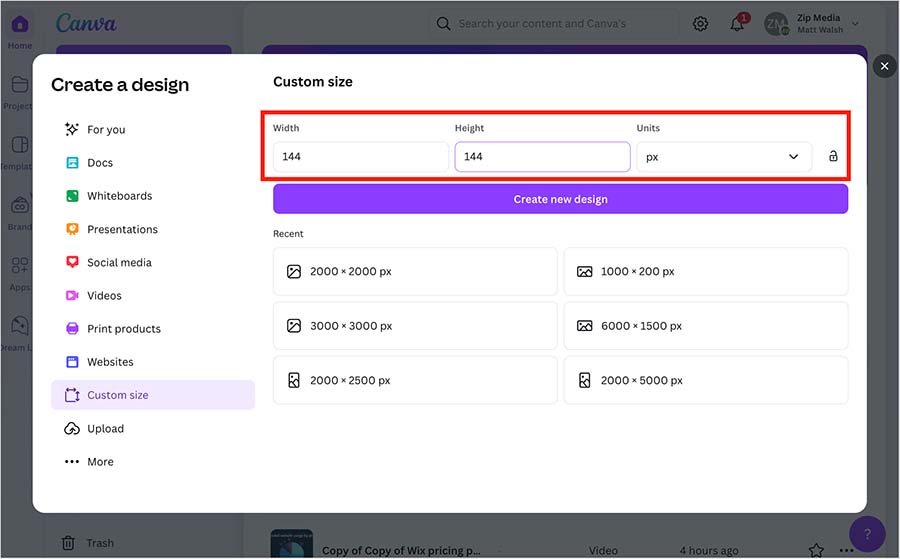
First, open Canva and click the ‘Create a design’ button in the top left corner of the screen. Then, click on ‘Custom size’.

Enter 144px into both the width and height boxes, and click the ‘create new design’ button.
(Favicon files sized at 144px by 144 px work well across most browsers and in Google search results.)
You can now design your favicon in the Canva designer by adding graphics and / or text to your blank canvas.
Remember however to keep it very simple here. Most browsers resize your favicon design down to a mere 16px by 16px — so try to create an ultra-clear design that will remain legible at a very small scale.
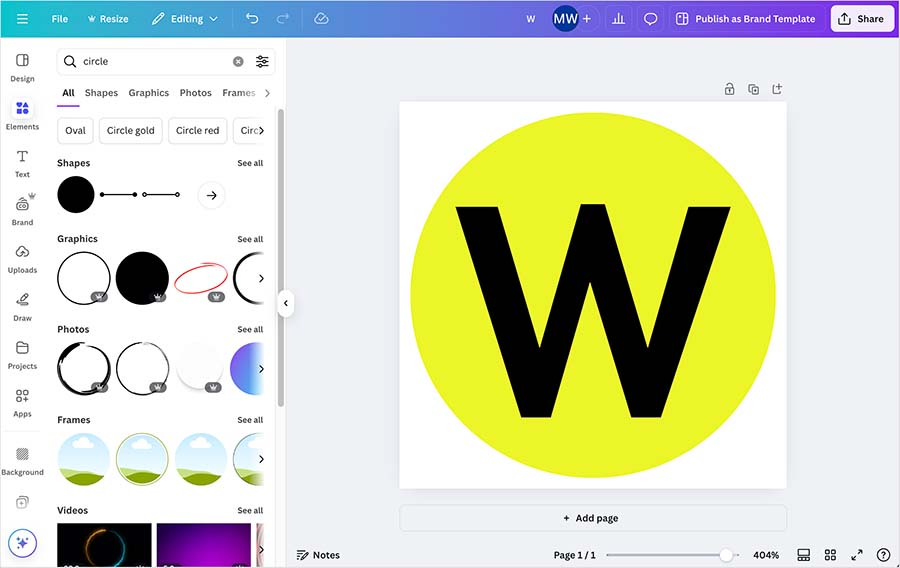
Once you are happy with your favicon design, hit the ‘Share’ button in Canva, click on ‘Download’ and then export your favicon as a transparent PNG file.
With your freshly-minted favicon downloaded to your computer, it’s time to add it to Squarespace.
Step 2 — Add your favicon to your Squarespace site
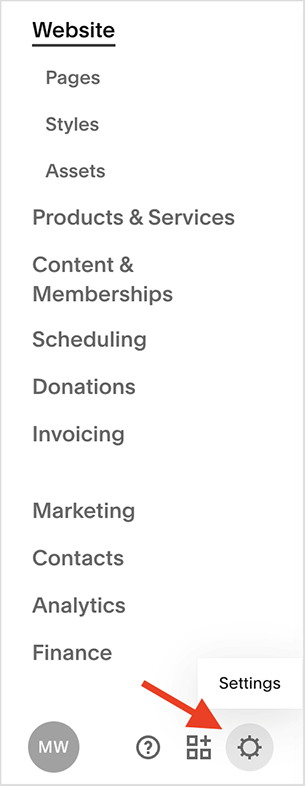
Over in your Squarespace account, click on ‘Settings’ cog icon at the bottom of your Squarespace dashboard.
Next, click on ‘Favicon’ in the website settings section.
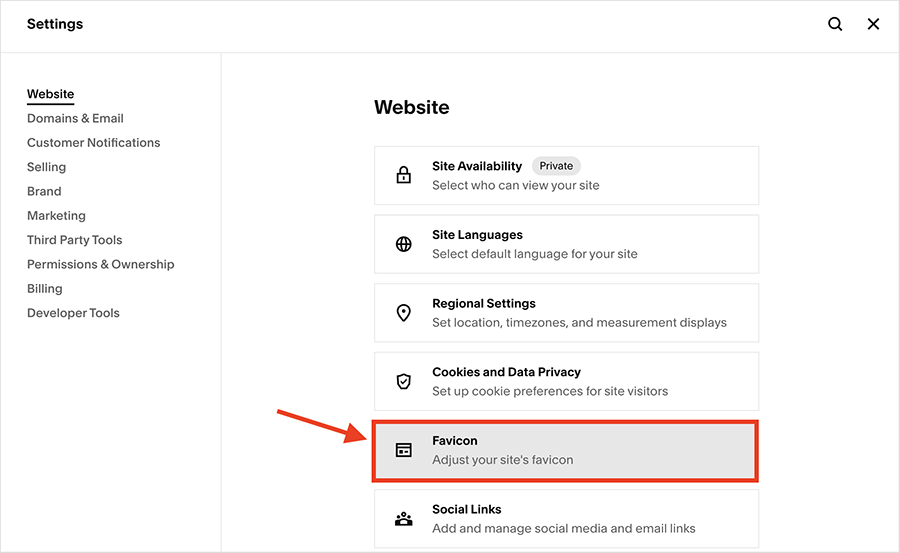
You will now see the favicon settings in Squarespace (pictured below).
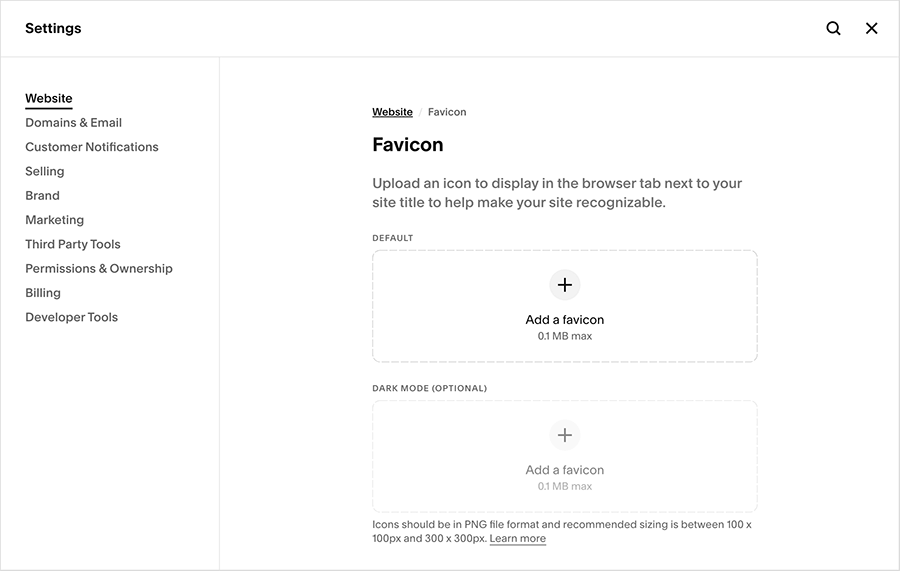
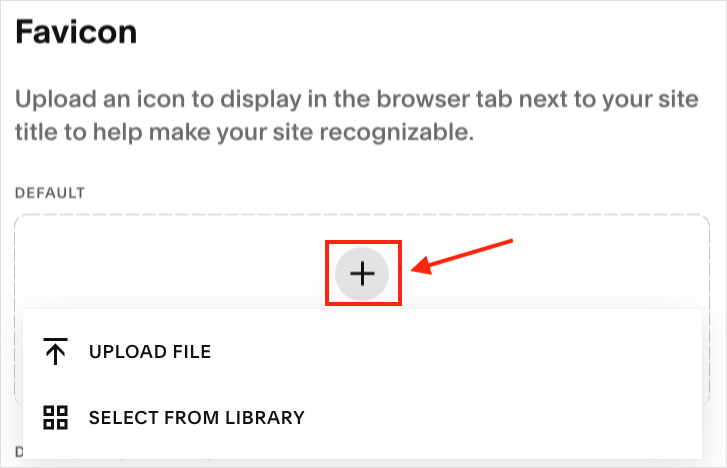
Click on the ‘+’ icon to upload your favicon file to Squarespace site.
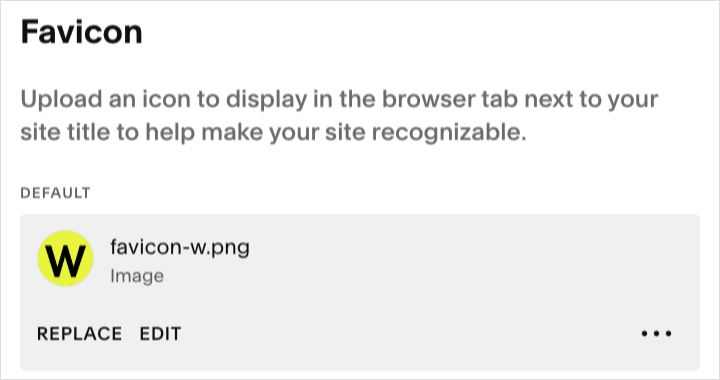
Your favicon image should now appear under the ‘default’ favicon settings.
Finally, click the ‘save’ button at the top right of the Squarespace interface.
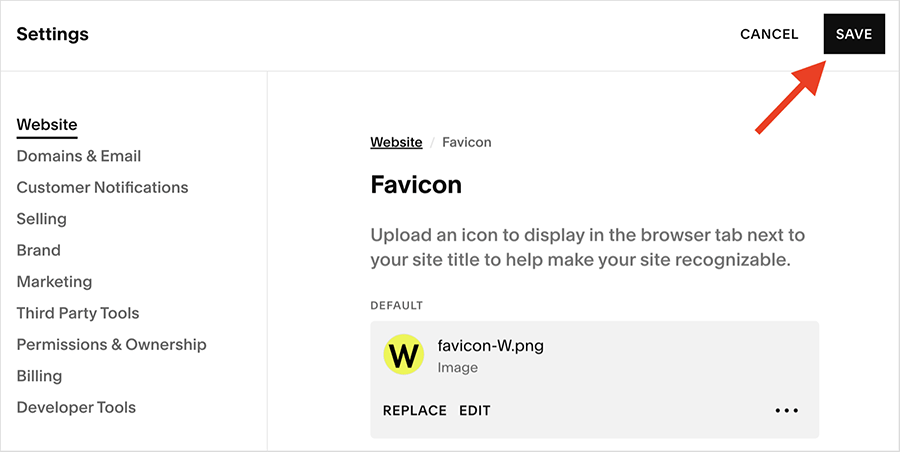
And that’s it, you’ve just added a favicon to Squarespace.
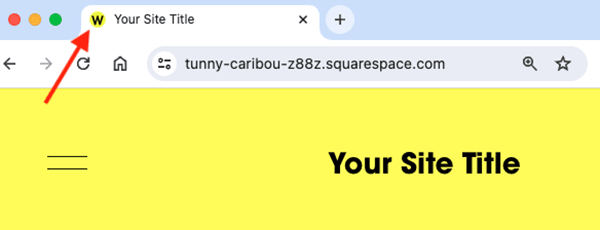
Tip: to see your Squarespace favicon in action, you may need to clear your browser cache first.
How to add or change a favicon in Squarespace — FAQ
What file formats can I use for a Squarespace favicon?
You can upload your favicon to Squarespace as a JPEG or PNG file. However, Squarespace recommends using PNG files for best results.
Can I upload multiple versions of my favicon to Squarespace?
Squarespace gives you the option to upload two versions of your favicon — the main design plus a secondary ‘dark mode’ version of it.
Why can’t I see the favicon on my Squarespace site?
If you’ve just added a favicon to your Squarespace site, but can’t see it on your browser tab, you may need to clear your browser cache. Once you clear your cache, refresh your page, and your favicon should now appear at the top of your browser. You’ll find instructions for clearing the cache in Google Chrome here, Safari here, and Firefox here.
No comments