We have a strict honest review policy, but please note that when you buy through our links, we may receive a commission. This is at no extra cost to you.

Canva vs Figma — which is better? In this detailed comparison, I compare an easy-to-use, ‘all-in-one’ design tool (Canva) with a leading interface design app (Figma), and help you work out which one is right for you. I also highlight some key alternatives to consider.
Quick verdict
Canva is the better choice for individuals and small teams who need to produce attractive visuals fast; its ease of use, wide range of design tools, affordable pricing, and huge template library make it perfect for non-designers.
Figma is more geared towards professional designers and collaborative teams working on UI/UX projects. Although like Canva it can be used for general purpose design, it’s really best suited to activities like prototyping and precision vector work.
Getting started with Canva or Figma
Let’s begin with a look at the key differences between the two tools.
Canva and Figma: understanding the key difference
Canva is an ‘all-in-one’ tool aimed at users with minimal or no design experience. It provides a wide range of easy-to-use design features and assets, including templates, royalty-free images, and highly intuitive image editing tools.
These can all be used to create a huge variety of visual assets — everything from banner ads to social media graphics to posters.
Figma, on the other hand, is primarily geared towards interface design. It excels in wireframing and prototyping for websites and apps, offering robust collaboration tools that are essential for team-based design projects.
Additionally, its vector-based design capabilities and real-time collaboration features make it a go-to solution for professional app designers and developers.
So at first glance, the two platforms seem like quite different tools. However, the lines between Canva and Figma are becoming increasingly blurred. Both platforms are now used for various types of web design projects; and they both include whiteboarding tools and PowerPoint-like slideshow creation features.
So in this comparison, I’ll explore how Canva and Figma stack up when it comes to these shared features, while also discussing the strengths and weaknesses of the two tools when it comes to their more unique functionality.
Let’s continue then with a look at exactly how Canva and Figma work.
How do Canva and Figma work?
Canva and Figma are both online apps that are generally accessed via a web browser. This cloud-based approach means that all design processing happens online; this allows users to create designs without a high-end computer.
Both tools also offer desktop apps for Mac and PC too, though. But to get the most out of these, you’ll still need an internet connection — without one, you won’t have access to either tool’s asset library.
It’s probably fair to say that the desktop version of Figma is better for offline working than Canva, however. This is because Figma users tend to use its vector tools to create original design projects from scratch, and these work fine without an internet connection.
Canva users, by contrast, usually end up adapting existing templates and visual assets that can only be accessed online.
Both Figma and Canva operate a subscription-based pricing model, meaning you need to pay a monthly or annual fee for access. I’ll discuss these fees later in this comparison.
But first, a look at how easy both tools are to use.
Interface and ease of use
Considering Canva and Figma’s different target audiences — untrained designers and professional interface creators respectively — you shouldn’t be surprised to learn that the interfaces of both tools differ considerably.
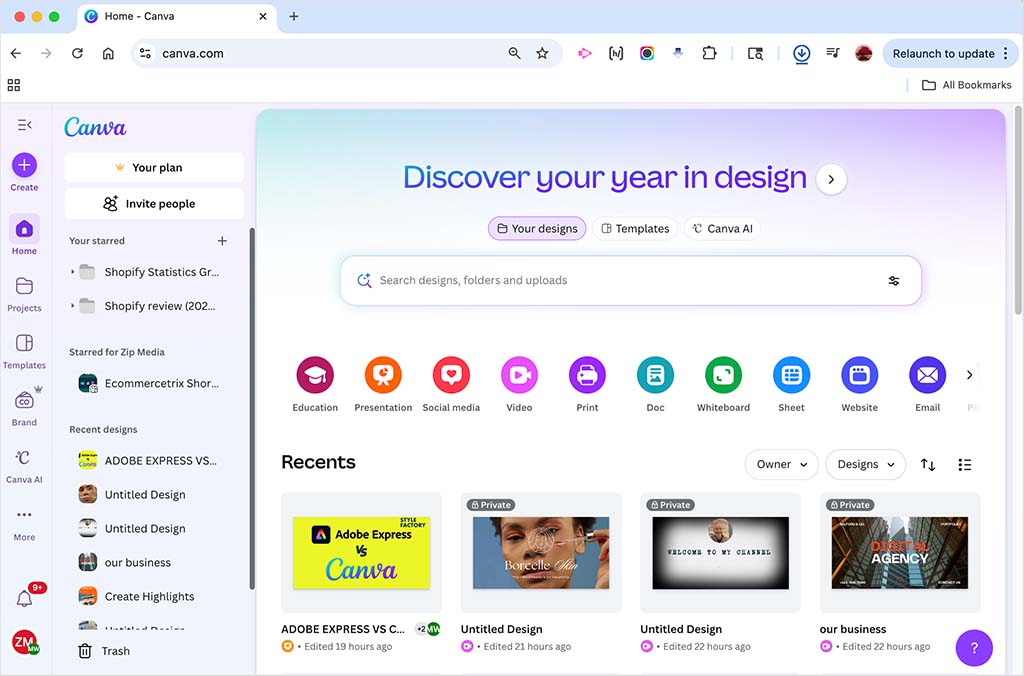
Canva’s design interface is all about being super-intuitive and therefore extremely easy for non-designers to use.
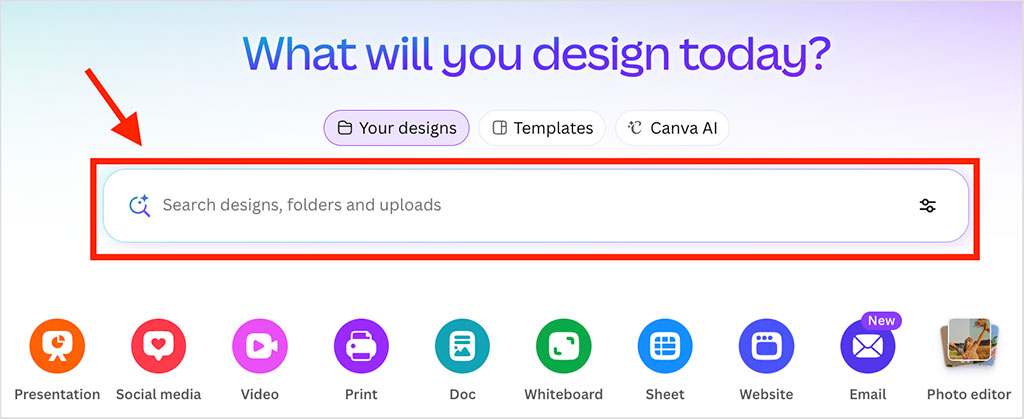
When you log in to Canva, you specify the type of project you want to create — for example an infographic, social media graphic, or video — by entering a suitable keyword into the search box at the top of the screen. This then takes you to a page filled with relevant templates to kickstart your design with.
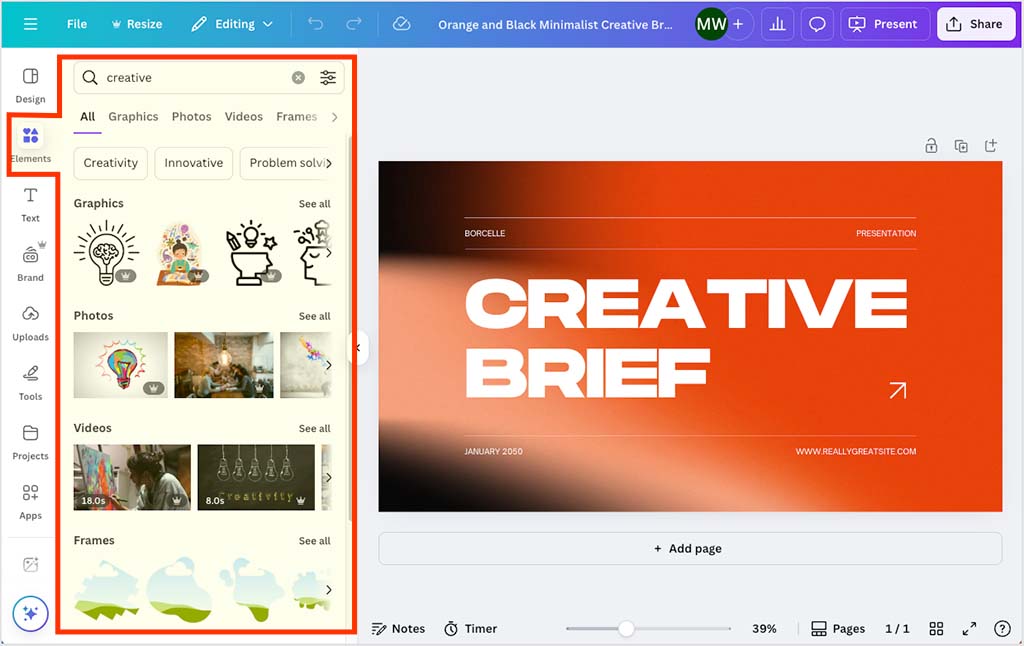
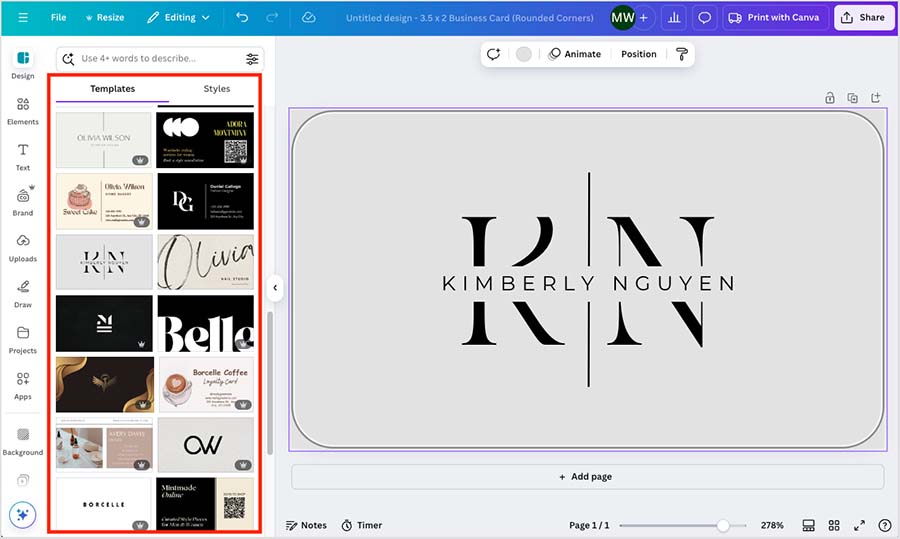
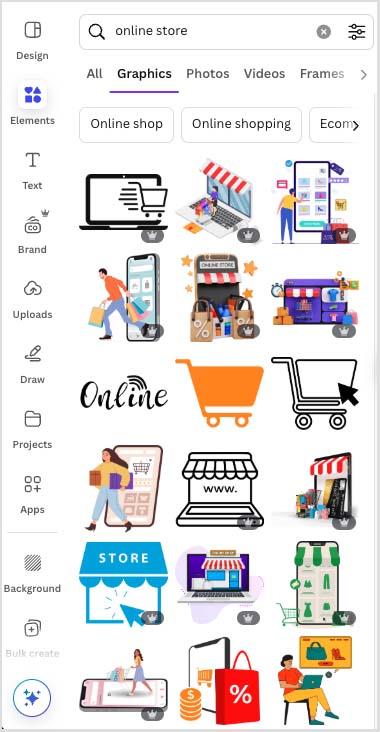
Once you start working with this template, you’ll find that Canva’s left-hand menu (pictured below) offers a wide range of options for incorporating ready-made elements into it.
These include:
- graphic elements (shapes, icons, outlines etc.)
- photos
- videos
- text
- animations
- assets you’ve uploaded
- brand colors.
Within this menu, you can use Canva’s ‘Elements tab’ to search through Canva’s extensive library of multimedia items and stock imagery — this makes it extremely easy to find the right assets and add them to your project.
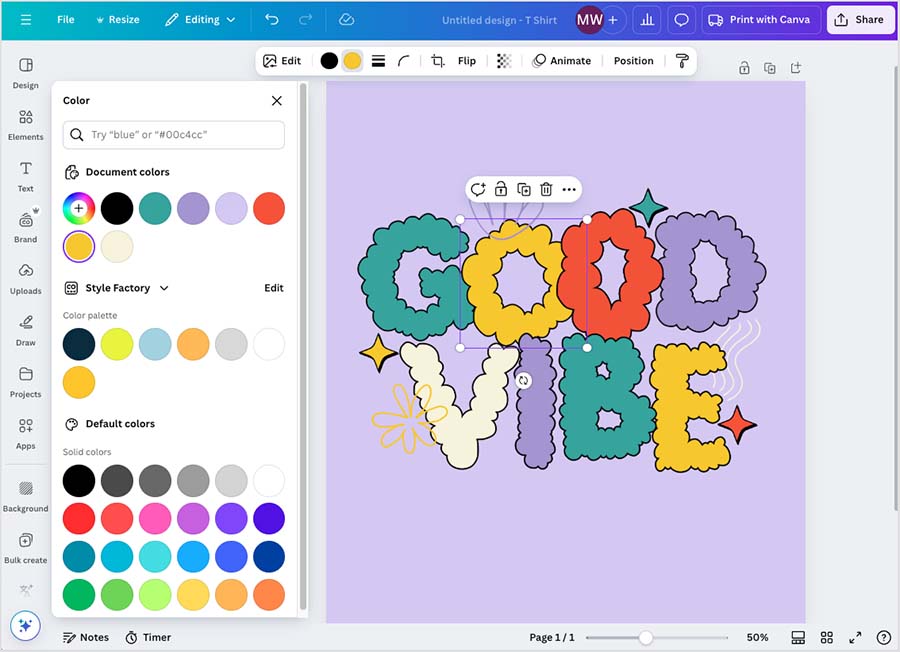
Adjusting your design with Canva’s drag-and-drop editor is also very straightforward. By clicking on an element, you can change its position, size or rotation using your mouse. Similarly, altering its colors or applying effects to it is just as simple — you just select the element, and a range of styling options appears at the top of the interface.
While testing Canva’s interface for this review, I found that most features responded quite quickly. I did experience some slightly annoying lags when applying some text and effect presets, however.
Overall, Canva’s interface is highly intuitive and requires minimal learning. If you have basic computer skills, or familiarity with software like Microsoft Word or PowerPoint, you should be able to create a professional-looking design in Canva within a few minutes.
So, how does Figma’s interface compare?
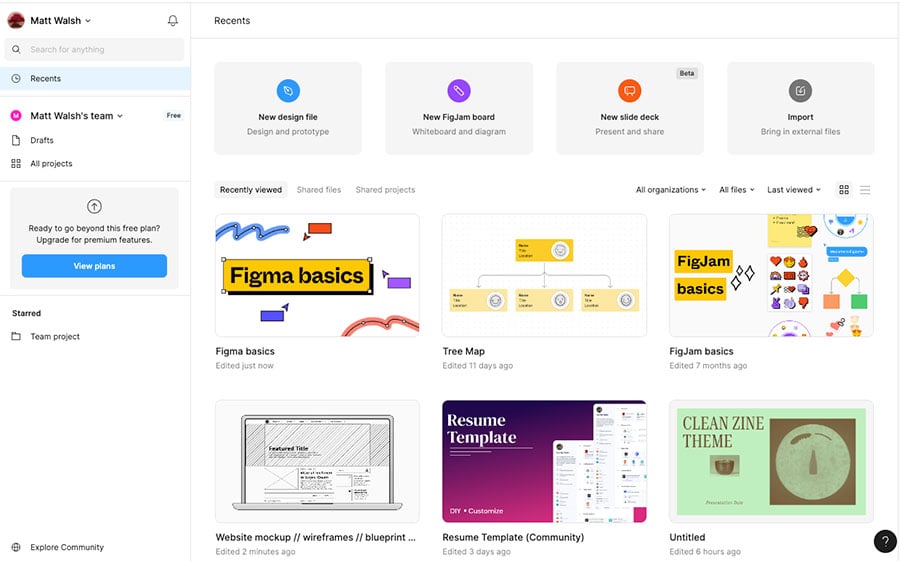
Well, Figma features a minimalistic interface tailored for professional design work, especially in UI/UX design.
Unlike Canva, Figma doesn’t present you with a library of ready-made assets upon logging in. Instead, it provides powerful tools for creating custom designs from scratch.
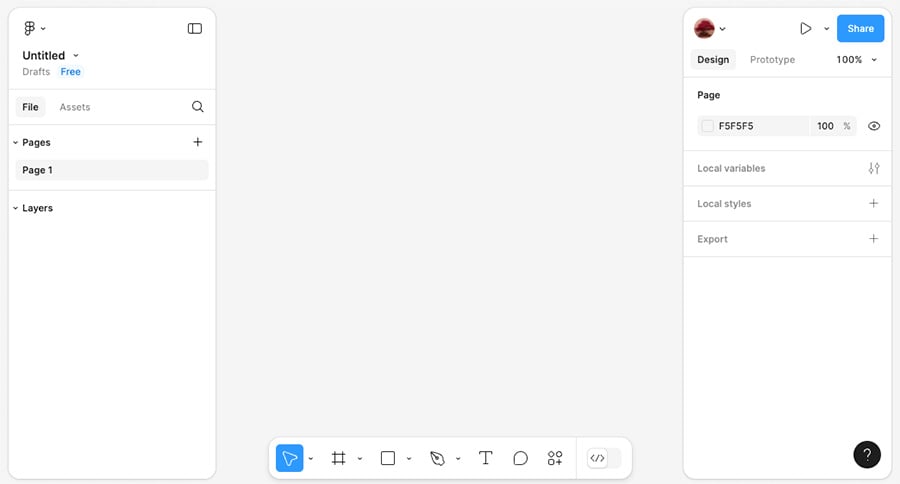
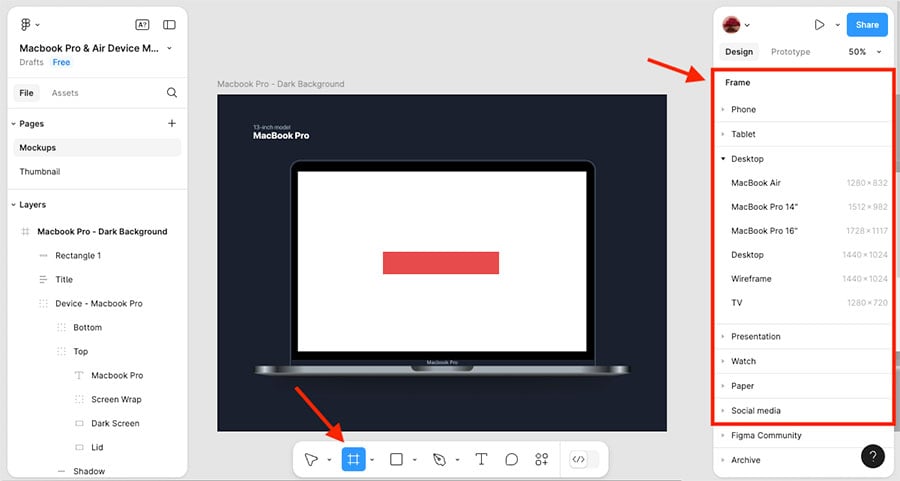
Figma’s interface comprises a workspace with a toolbar at the bottom, a layers panel on the left and a settings panel on the right. Key tools available include:
- a frame tool — this lets you create frames for different screen types, like mobile devices, tablets, and desktops.
- a vector shapes tool — this lets you draw and manipulate basic shapes, with various controls available for joining, subtracting and intersecting shapes for more complex results.
- a pen tool — similar to the drawing tools in Adobe Illustrator, the pen tool in Figma lets you create custom vector paths with precision for intricate original design work.
- a ‘component system’ — this allows you to create reusable design elements that can be updated globally across your project. This is particularly useful for maintaining consistency in designs involving recurring elements.
As you can see, the standard interface controls in Figma are considerably more ‘technical’ in nature to those in Canva, and — as is to be expected — using them comes with a much steeper learning curve.
That said, if you have experience with professional design tools like Adobe Photoshop or Adobe Illustrator, you’ll find that Figma’s interface contains a lot of familiar features, and you should be able to get going with it fairly easily.
One thing I would stress is that to be able to use Figma’s interface efficiently, it’s best to learn some of the many keyboard shortcuts available for it. Without knowledge of these, you might find it tricky to perform even basic tasks like zooming in to your artboard, flipping shapes or switching views.

You can access Figma’s shortcuts by clicking on the question mark icon at the bottom right of the Figma interface.
As for the performance of Figma’s interface, I was extremely impressed with it while using the browser-based version of the app. Even when I was working on complex projects with lots of layers and components, its response times were lightning fast, and I encountered almost no lagging or rendering issues when applying effects or dragging and transforming components in my projects.
Overall, both interfaces are extremely fit for purpose. When it comes to ease-of-use, as you might expect, it’s a win for Canva. Its interface is exceptionally intuitive, and its template-first design approach allows anyone with basic IT skills to create impressive designs quickly.
That said, despite being much harder to start out with, Figma’s interface is extremely fit-for-purpose and exceptionally fast. Its advanced features and high performance provide the control and efficiency needed for complex professional design projects.
Free trials for Canva and Figma
Both Canva and Figma offer free versions of their platforms.
With Canva, there’s a cut-down ‘free plan’ available, which you can use indefinitely. Alternatively, you can get free access to the full version of Canva for 30 days by following the link below.
Figma offers its users a free forever plan too, but this is very limited in functionality, and can only be used for 3 collaborative projects.
Now, let’s dig deeper into the many design tools and capabilities of Canva and Figma.
Design tools and capabilities
As I discussed above, Canva and Figma are two very different design tools. As a result, each tool comes with quite a few features that you won’t find in the other.
Figma’s unique features are generally of a fairly technical nature. Unlike Canva, the app gives you:
- the option to work with ‘variable’ fonts
- the ability to create reusable design components with global settings
- a prototyping tool for making interactive versions of draft web designs.
And some of the key options you get in Canva but not in Figma are:
- a word processing tool for designing documents
- a video editor
- tools for creating interactive graphs and charts
- the ability to design and manufacture a wide range of print products (business cards, flyers, notebooks, etc.)
Now, despite the significant difference in the focus and scope of the features in Canva and Figma, there are also a good number of features they have in common. Let’s take a look at these now.
Templates
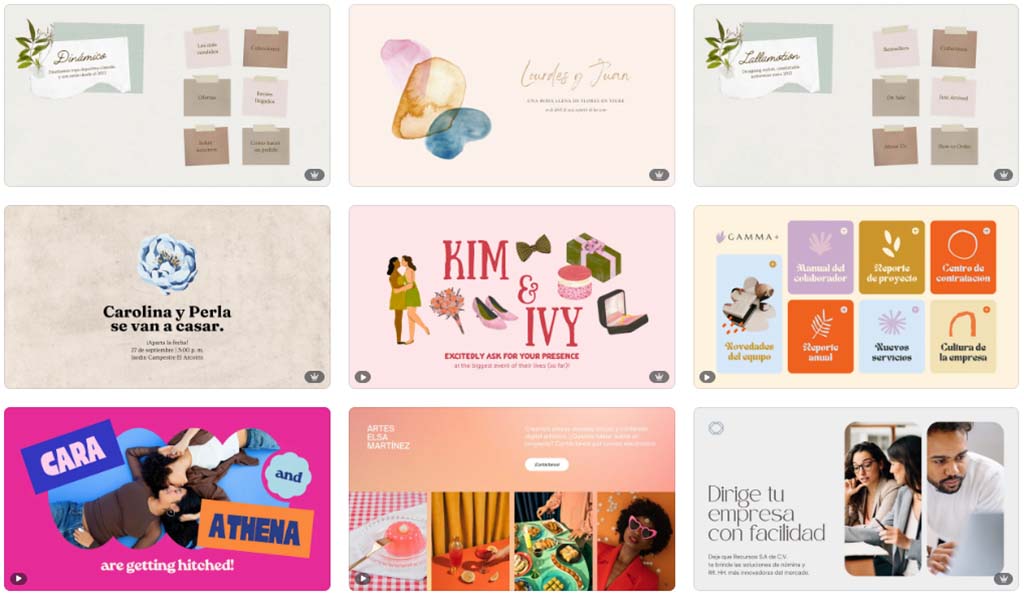
If you’re looking to jumpstart a design in Canva or Figma, both platforms provide a wide range of ready-made design templates that you can customize for your own purposes.
In Canva, there are literally millions of free templates on offer — you get access to more than 3.6+ million templates on all paid Canva plans (with Canva’s free plan providing a very generous 1.6+ million).
You can get a flavour of what’s available by browsing the Canva template library.
To give you a quick taste of the sheer volume of Canva’s template offering (and the variety of design categories catered for), here’s a quick breakdown of Canva templates by popular design types:
- Instagram templates — 20,000+
- Video templates — 15,000+
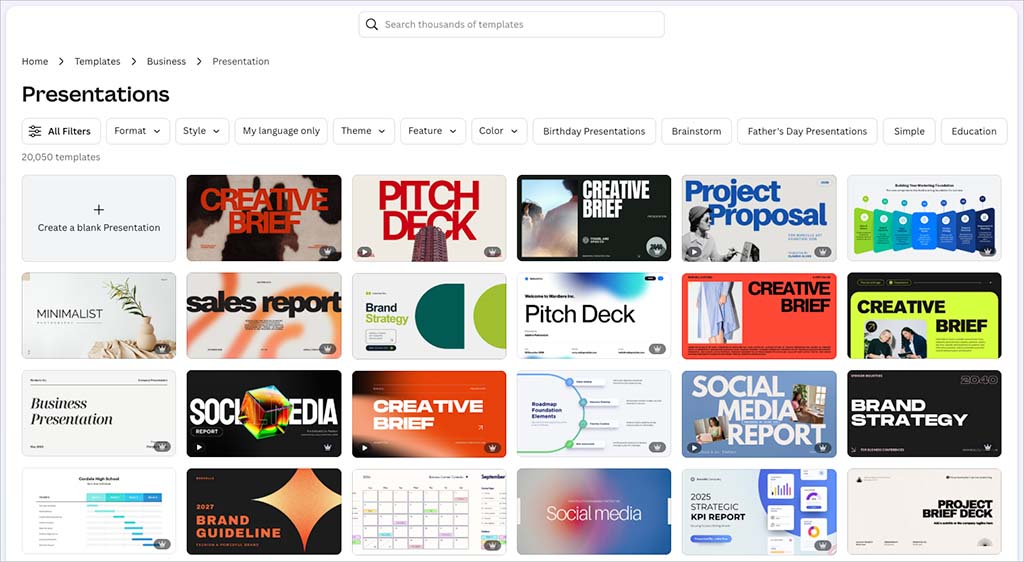
- Presentation templates — 20,000+
- Logo templates — 20,000+
- Education templates — 20,000+
- Whiteboard templates — 1,600+
- Document templates — 1,500+
Working with templates is extremely easy in Canva. You simply go to its ‘What will you design today?’ search box on the main page of your Canva dashboard and enter a phrase that describes the type of template you want to work with; you then pick the one you want to use from the template results page to start making it your own.
If you feel like changing your template, you can do so easily by picking a new one in Canva’s ‘Design’ menu in the left side of the design interface.
In terms of the quality of Canva’s templates, they are generally extremely well made, and every design category includes a wide range of styles and aesthetics.
(It’s also worth noting that a large proportion of Canva’s 5,000+ employees are exclusively dedicated to creating new templates for the platform; consequently, there are hundreds of new template options in every category added to the platform every week.)
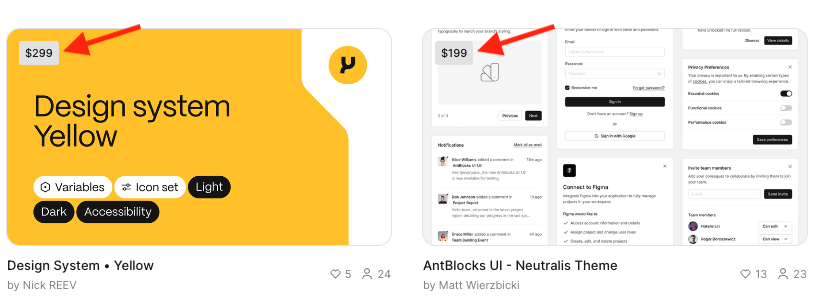
Figma’s template selection is nowhere near as large as Canva’s, with just a few thousand templates available.
(The platform doesn’t provide official details on the precise number available, unfortunately.)
And I found that templates in Figma are much less ‘baked in’ to the platform than in Canva. Most available templates are created by third-party suppliers; and to access them, you need to navigate to the ‘Figma Community’ portal by clicking on the ‘Explore Community’ button in the bottom left of the Figma interface.
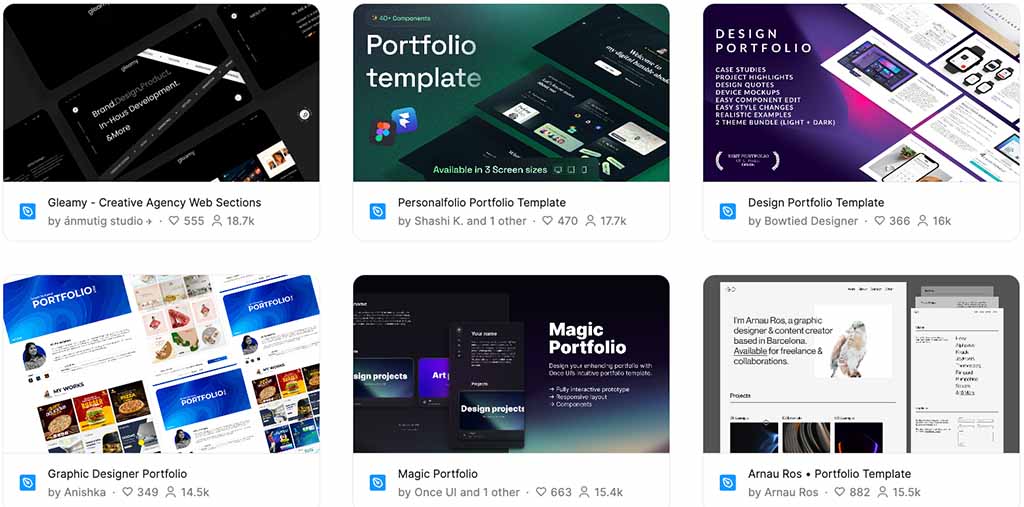
In terms of the categories of templates available in Figma, these cover the most popular design types for Figma’s professional interface designer userbase, including:
- Design templates for desktop apps, websites, mobile apps, resumes, CVs and Instagram posts
- Slideshow templates
- Wireframing templates
- Whiteboard templates.
However, it should be noted that, unlike Canva’s, using many of Figma’s templates involves an additional fee (ranging from $2 all the way up to $500) — so using templates in Figma can get very pricey indeed.
That said, Figma templates do give you quite a lot of bang for your buck. For example, some of the wireframing templates in Figma contain as many as 1,000 different customizable components.
But overall, thanks to its much larger template selection as well as the fact that all its templates are free, Canva definitely wins the template head-to-head.
Stock assets
Canva is also the better platform when it comes to letting you access stock assets (photos, graphics, icons, video, audio etc.) for use in your designs.
The ‘Elements’ panel in the Canva designer contains more than 141 million stock assets in total — all of these are available for free on paid Canva accounts, and free plan users get access to 4.7+ million of them.
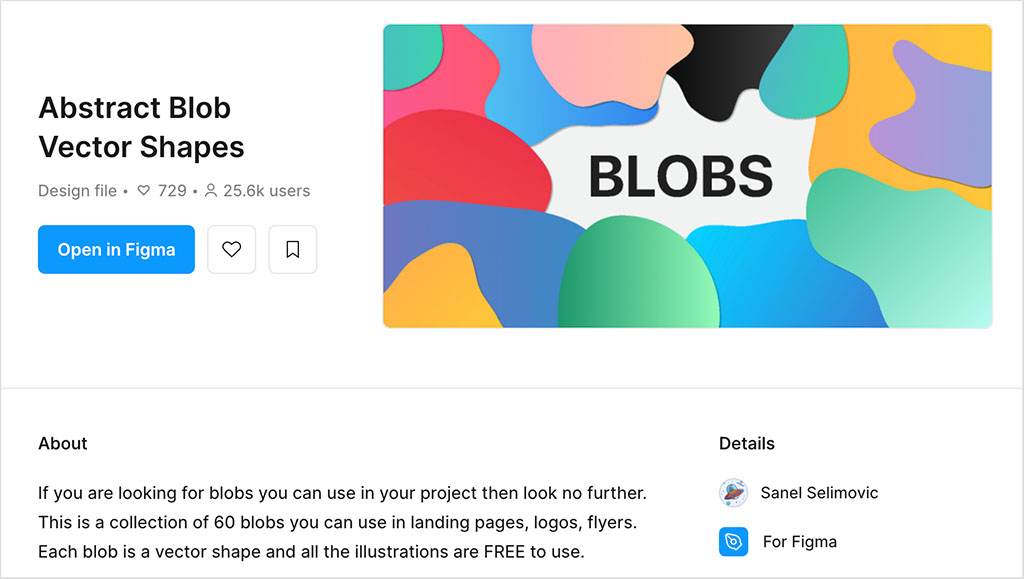
It’s a different story in Figma: there are no stock assets available in the main designer whatsoever.
And, although Figma’s community hub does include a good set of icon packs and UI kits, adding these to your design involves exiting the main app to trawl through the available options in the Figma Community Hub. Once you find one you want to use, you then have to load it into your Figma account, all of which can be time-consuming.
And, as with Figma’s design templates, using many of the better stock asset packs involve significant extra fees.
Now, while it’s fair to say that most Figma designers are likely to be using original brand photos and other bespoke assets in their designs, most design projects tend to involve some degree of generic asset usage. So it would be good to see Figma provide access to stock asset libraries in future.
Drawing tools in Canva and Figma
Both Canva and Figma offer drawing capabilities, but they cater to different needs and levels of expertise. Whether you’re looking to quickly sketch something out or create more intricate designs, both tools provide options for drawing directly on the canvas.
In Canva, drawing is designed to be straightforward and accessible. The platform offers a simple drawing tool that includes a pen, marker and highlighter, and these let you draw freehand on your designs. This is particularly handy for adding personal touches, annotations, lines or doodles to your work.
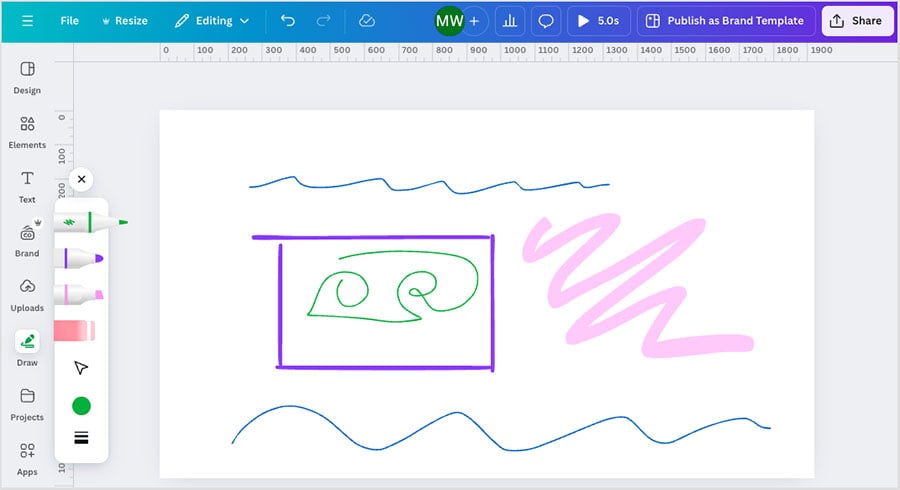
While Canva doesn’t offer the precision or advanced features of more specialized design software, its simplicity is its strength — its drawing tools are ideal for users who need to add a bit of freehand creativity without complexity.
In Figma, by contrast, digital drawing is taken to a professional level thanks to a suite of tools that cater to both freehand and technical drawing work (with newer additions like ‘Figma Draw’ further strengthening its support for expressive, freehand illustration alongside more technical workflows).
Its pencil tool provides a similar fluid drawing experience to Canva’s draw tool, with some additional options available for adding square or round ends to your pencil strokes.
However, Figma’s vector pen tool gives you significantly better drawing functionality than anything you’ll find in Canva.
Ideal for technical drawing tasks, it enables you to draw straight lines, curves, and complex shapes with precision. Similar to equivalent pen tools in Photoshop or Illustrator, the pen tool lets you add, subtract or manipulate anchor points on your stroke to adjust and refine your designs until they are just right.
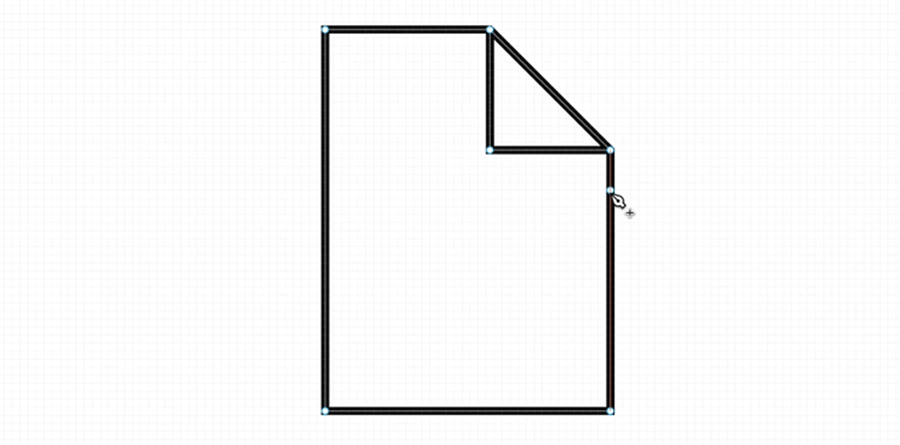
One of Figma’s most powerful features related to drawing is its ‘vector networks‘ functionality.
Unlike traditional vector tools that limit you to a single path connected by anchor points, Figma’s vector networks allow multiple paths to connect to a single point. This means you can create complex, interconnected designs without being restricted by linear paths.
The vector network feature is particularly useful in intricate designs where elements need to connect in multiple ways — for example, in detailed icons or complex UI components. It gives you unprecedented control over the structure of your drawings, making it easier to create and edit complex shapes while maintaining precision and flexibility.
So while both platforms cover the basics of digital drawing nicely, the precision and accuracy on offer from its vector pen tool makes this a definite win for Figma.
Photo editing
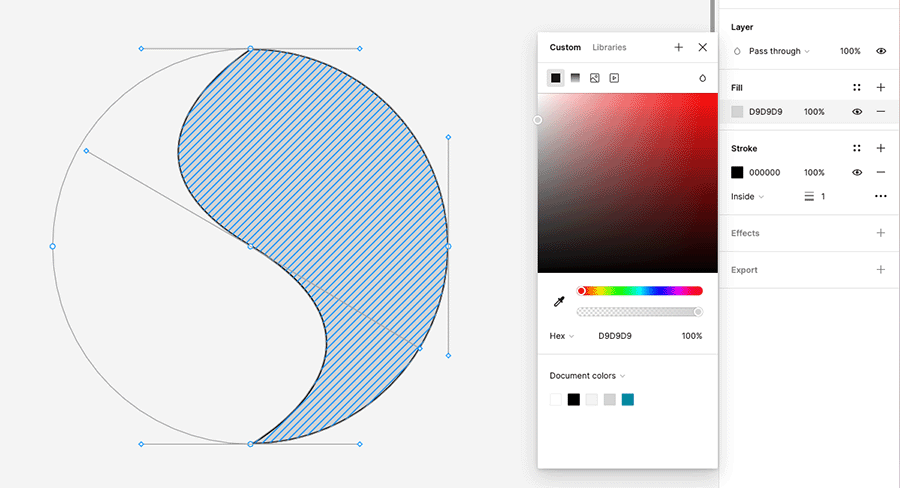
Canva and Figma both provide you with various options for editing and manipulating the images you add to your designs.
I was a bit surprised however to discover that the photo editing features in Figma are rather basic.
They let you adjust settings like exposure, saturation, tint, and contrast, and facilitate basic cropping and resizing — but more complex image edits will need to be done in external software.

That said, Figma has made some recent moves to expand its image-handling capabilities. It now offers AI-powered image generation tools, along with a background removal feature, which makes it easier to prepare and incorporate imagery directly within the app. These additions help close the gap somewhat, but Figma’s image editing tools still feel more utilitarian than creative, and are clearly designed to support design workflows rather than replace a dedicated photo editor.
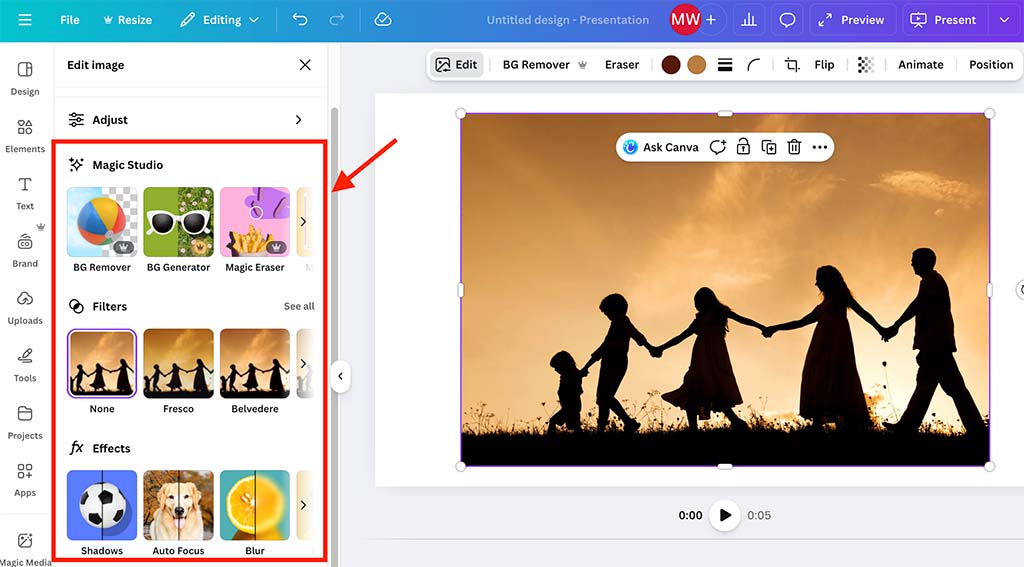
By contrast, despite being the more ‘amateur’ tool of the two, Canva’s image photo editing capabilities are more extensive. In addition to the standard photo colour settings you get in Figma, Canva gives you several other ways to adjust your images. You get:
- the option to copy the style of one photo to another
- a large range of Instagram-style photo filters
- a set of photo effects for adding shadows, retouching skin and creating duotone images
- a suite of AI photo editing tools that let you expand a photo’s background, grab individual elements of a photo, and erase unwanted items from your image.
As is to be expected with Canva, using all of these photo editing features is quick and easy, and gives you results that will be more than adequate for most online use cases.
Although Canva’s photo editing capabilities are no match for the industry standard image editor, Photoshop, I find myself using its ever-improving image editing tools with increasing frequency for a large number of content creation photo jobs.
So overall, when it comes to built-in photo editing capabilities, the tool with better features is Canva.
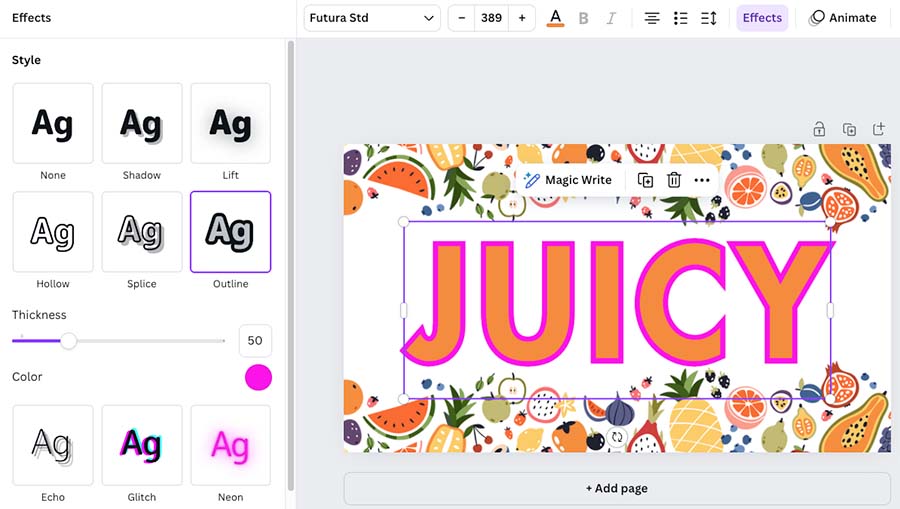
Typography
Canva has a slight edge over Figma when it comes to the number of pre-installed fonts available. It supplies you with around 3,000 fonts out of the box, while Figma only gives you around 1,500.
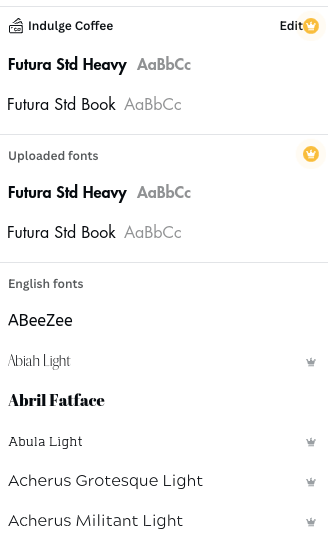
Both platforms also let you upload your own fonts — or ones you’ve downloaded from a font foundry like ‘Adobe Fonts’ — without too much difficulty.
When it comes to working with typography, it’s another case of Canva and Figma providing settings and techniques that are suited to their specific userbases.
So in Canva you get some very easy-to-use typography features — these include text effects (drop shadow, outline, curved text, etc.), basic text alignment settings and simple line spacing tools.
In Figma, by contrast, you get much more fine-grain control over typography adjustments. Just some of the typography settings you can work with include:
- line height (leading)
- letter spacing (tracking)
- paragraph spacing
- indentation
- ‘uppercase,’ ‘lowercase,’ ‘title case’ and ‘small caps’
- stroke and fill opacity levels
- character variants
- auto width, auto height and fixed size text boxes.
One of the most useful typography features in Figma is its ‘text styles’ controls. These let you reuse typography settings (font family, size, weight, line height, letter spacing, etc.) across an entire project.
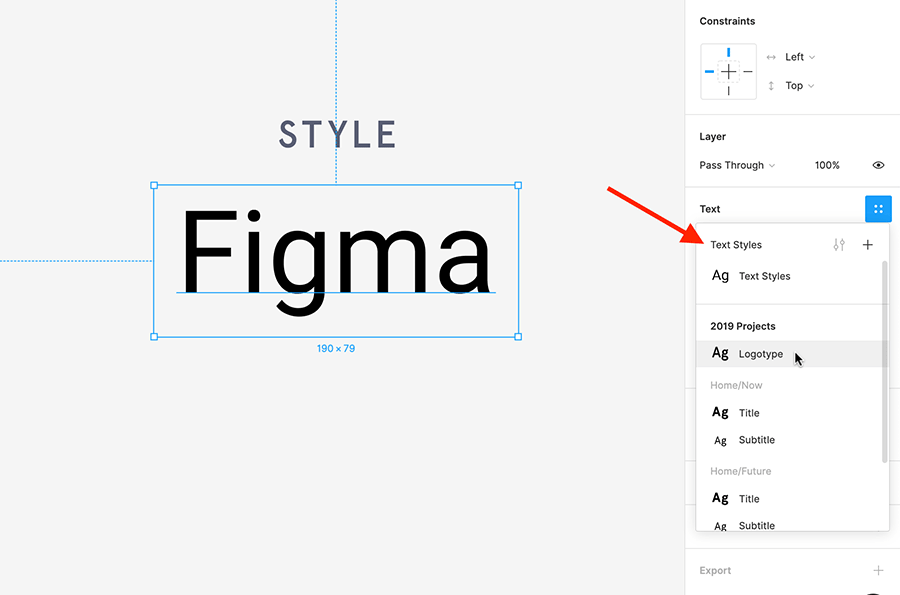
If you update a ‘text style’ in your design, it automatically updates all instances where that style is used, making it easy to maintain consistent typography throughout a design.
Additionally, Figma also lets you work with ‘variable fonts,’ an increasingly popular font format among web designers.
Variable fonts differ from traditional fonts in that they consolidate multiple styles and variations (such as different weights, widths, and slants along defined axes) into a single font file, while traditional fonts involve separate files for each style (e.g., Regular, Bold, Italic).
These fonts allow Figma web designers to use a single font file that consolidates multiple styles and variations. This consolidation offers more flexibility and customization, enabling designers to create responsive typography that adapts to any screen size without the need to load multiple font files.
So, both Canva and Figma provide appropriate font and typography options for their respective userbases, but overall, Figma is the stronger tool when it comes to the more technical side of typesetting.
Designing for the web
Web design with Canva
Canva’s website builder feature is a user-friendly tool designed to give you a simple, code-free way to create visually appealing websites.
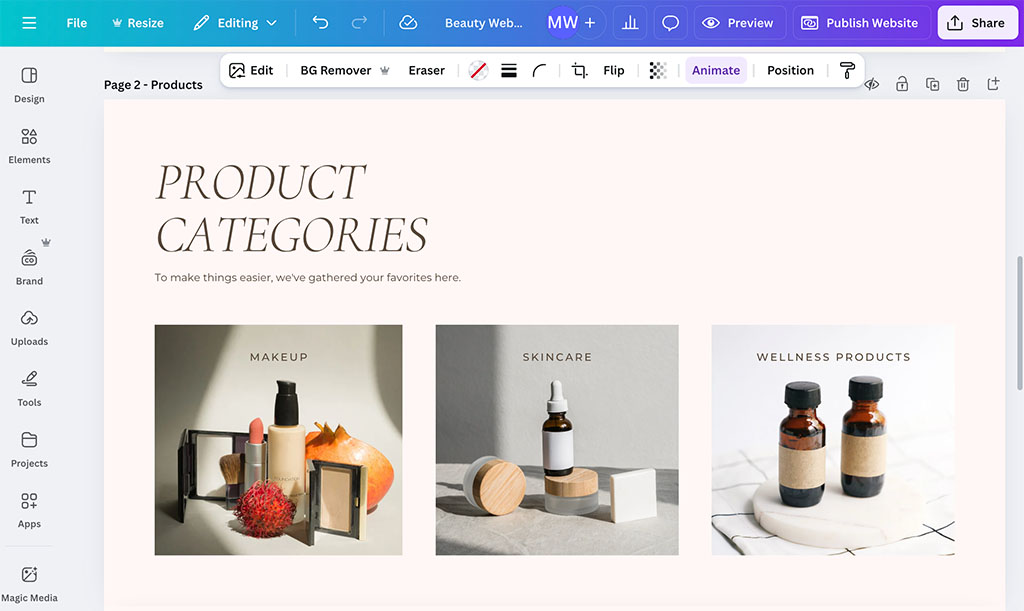
With Canva’s website feature, you can quickly design and publish single-page websites or landing pages that are responsive and accessible on both desktop and mobile devices.
The platform offers over 3,000 customizable website templates covering a wide range of use cases. These bundled templates let you build portfolios, event pages, small business sites; coaching sites and more.
You can view all these templates here.
Additionally, Canva websites can be mapped to custom domain names, allowing you to use a personalized, professional URL on your site.
However, Canva’s website builder is fairly limited in several significant ways.
It doesn’t let you create sites with multi-page navigation, and if you’re looking for control over SEO, ecommerce integrations or data capture features — the sort of things you get as standard with proper website building tools like Squarespace, Wix or Shopify — you’ll be disappointed.
On the whole, Canva’s website builder is a handy option to have if you need to knock out a website quickly for a one-off event or a school project, but for anything more serious, you’d be well advised to go with a more professional website building solution.
Web design with Figma
While Canva’s web design tool is very basic in nature, Figma gives you a specialized environment for drafting, designing and prototyping complex web and mobile applications.

Importantly — and in contrast to Canva — Figma places no limitations to the number of pages you can create in your web design projects.
But it’s important to bear in mind that, out of the box, Figma isn’t a website publishing platform. It’s designed to let you define the exact layout, structure, and visual style of a website — not to build or host it live. That said, a range of plugins and integrations are available that can help turn Figma designs into working websites using dedicated site-building tools, which I’ll cover shortly.
In Figma, the foundational building blocks for your web design projects are called ‘frames.’ These act as containers for your design elements and can represent anything from an entire webpage or screen to a smaller component within a larger design.
There are around 70 frame options available covering a wide range of popular device screen sizes — these include MacBooks, iPhones, Pixel phones, Apple watches and social media platforms among others.

A key aspect of Figma’s web design capability is that it lets you design ‘responsively.’ Responsive design involves creating websites that adapt smoothly to various screen sizes and devices, ensuring a consistent and user-friendly experience.
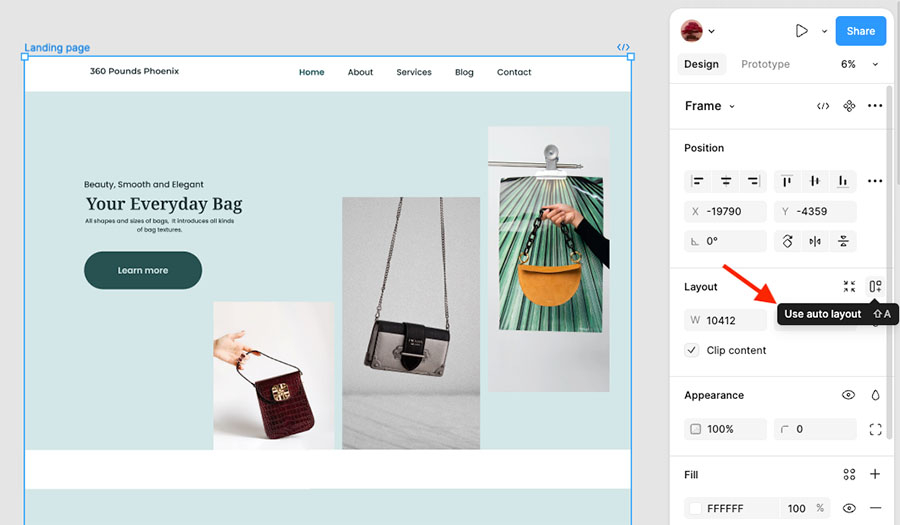
In Figma, this process is streamlined with tools like ‘Auto Layout,’ which allows components to resize and reflow based on the content and screen sizes involved.
You can also use ‘constraints’ to define how elements should behave when the screen dimensions change, ensuring that your design remains intact across different devices.
To further refine responsive designs, Figma’s ‘layout grids’ can be set up to match your design’s intended breakpoints, ensuring that content aligns correctly across various screen sizes.
By adjusting these grids and combining them with components that are built with Auto Layout, designers can create flexible, responsive layouts that maintain their structure whether viewed on a desktop, tablet, or smartphone.
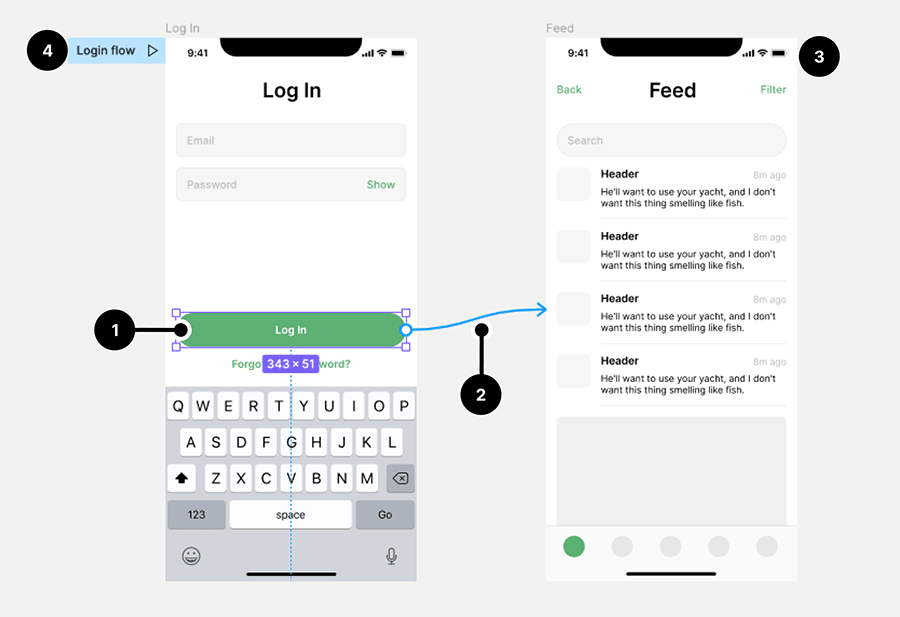
Another of Figma’s most significant features is its prototyping capability.
While Canva simply allows for the creation of very basic websites, Figma enables designers to build fully interactive prototypes that simulate the user experience of a live website or app.
You can link frames to simulate navigation, add hover states, and include interactive elements like buttons and dropdowns, creating a realistic representation of the final product. Figma’s live prototype feature allows the sharing of these designs with stakeholders, who can interact with the prototype directly in their browsers. This can help with feedback collation and the making of iterative improvements.
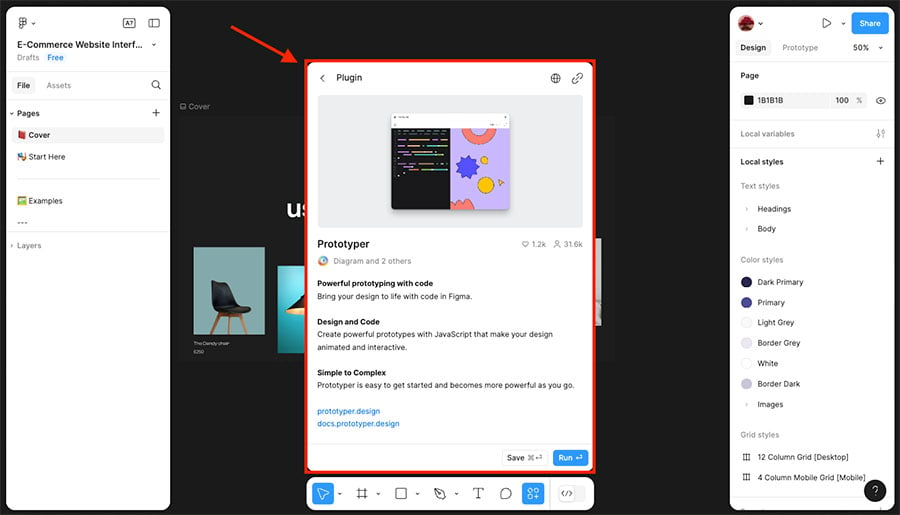
Figma also offers an increasing number of plugins that bridge the gap between design and development.
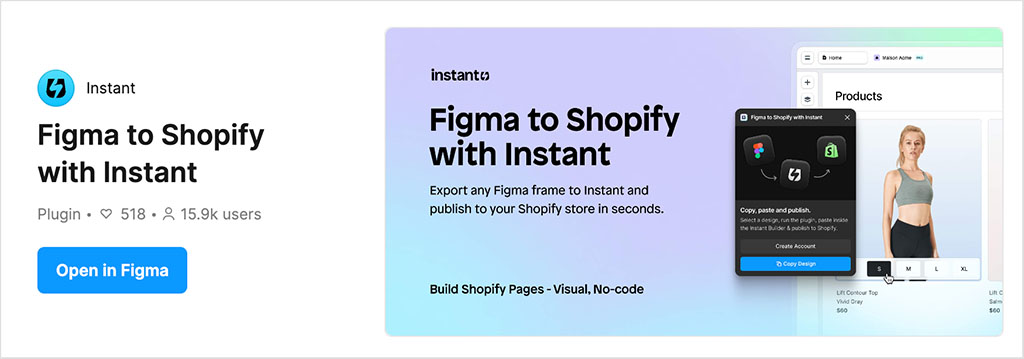
For example, the ‘Figma to Shopify’ plugin enables the exporting of designs directly into Shopify’s template language (‘Liquid’), streamlining the transition from design to a functioning ecommerce store.
Similarly, plugins for platforms like Wix Studio and Webflow allow designers to convert Figma designs into responsive sites on those platforms, preserving the intricate details and interactions defined in Figma.
(There is no official plugin available for converting Figma web design projects to WordPress format. However, Figma’s ‘Anima’ app is a widely-used plugin that converts Figma designs into responsive HTML, CSS, and React code. This code can then be used as a starting point for custom WordPress themes, or integrated into existing WordPress sites.)
On the whole, Figma’s features for creating extremely detailed and complex web designs are some of the best on the market, and are only matched by similar specialized UI interface design programs like Adobe XD and InVision Studio.
Note: With the rollout of Figma Sites (beta), Figma is starting to explore no-code publishing — a space that Canva has long dominated. The feature remains limited for now, but it’s an interesting sign of where the platform may be heading.
Whiteboard tools
Canva and Figma both offer powerful whiteboard tools designed for working on brainstorming sessions, mind maps, and all sorts of different visual collaborative project work.
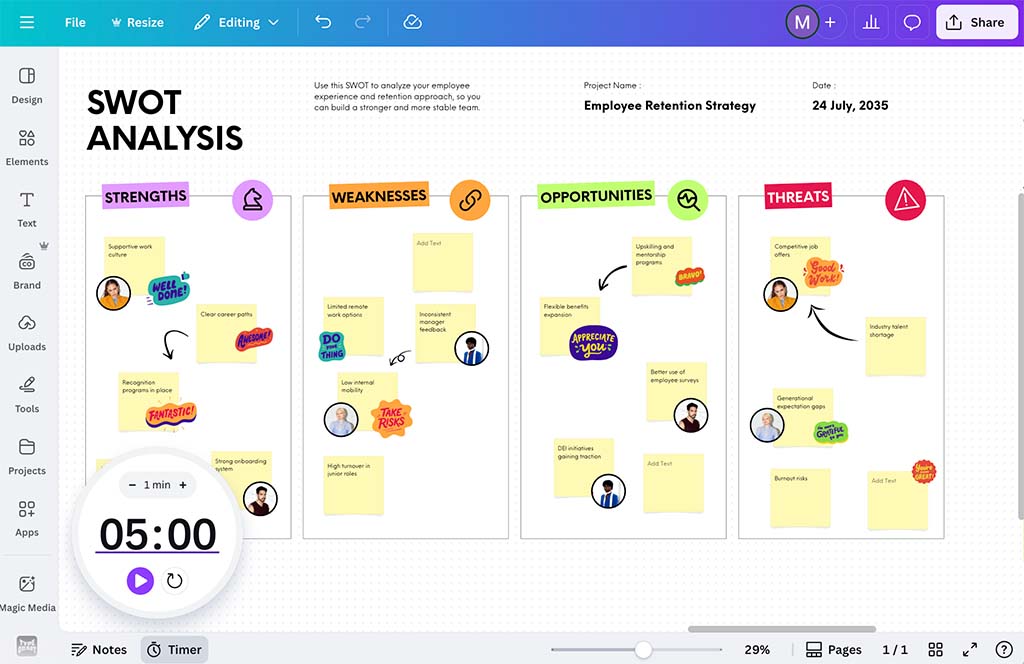
A key difference between both platforms’ whiteboard tools is that Canva’s whiteboard is embedded within the regular Canva interface, while Figma’s whiteboard — which goes by the name ‘FigJam’ — opens in a purpose-built environment separate from Figma’s main design tool.
FigJam keeps essential tools like the pen, sticky notes, and connectors always within reach. Consequently, it is more ‘beginner-friendly’ and intuitive to use than Figma’s main design and prototyping tool, because you don’t have to dig through menus to add content to your whiteboard.
(Incidentally, FigJam can also be purchased as a standalone product, which I’ll discuss in the pricing section below).
Canva has an edge when it comes to the number of ready-made whiteboard templates available, however — it offers 3,500 templates while Figma provides just 300 or so.
As for the zoom functionality on offer in both whiteboard tools, FigJam is slightly better here, letting you zoom in to your presentation at around 800%, while Canva restricts you to a 500% zoom.
(For the record — and for context — neither platform comes close to the 4,000% zoom-in capability of competing whiteboard software Miro.)
Canva’s whiteboard tool and FigJam are excellent platforms for collaboration, both offering a range of features that make it easy for teams to work together in real time.
Both tools allow multiple users to edit a board simultaneously, share comments, and use sticky notes to organize ideas.

You can also assign tasks, add text, and integrate visual elements like images and icons directly onto a board; this facilitates a seamless flow of ideas during brainstorming sessions.
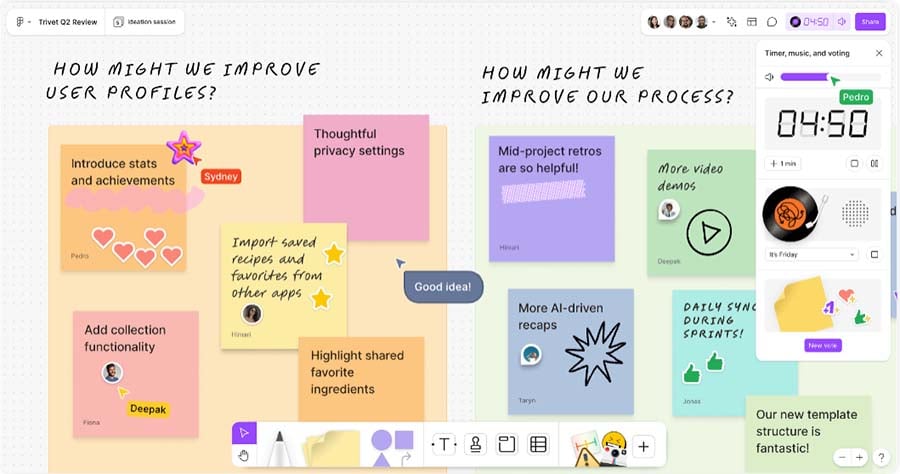
However, Figma’s FigJam takes collaboration one step further with some additional features designed specifically to enhance team interaction.
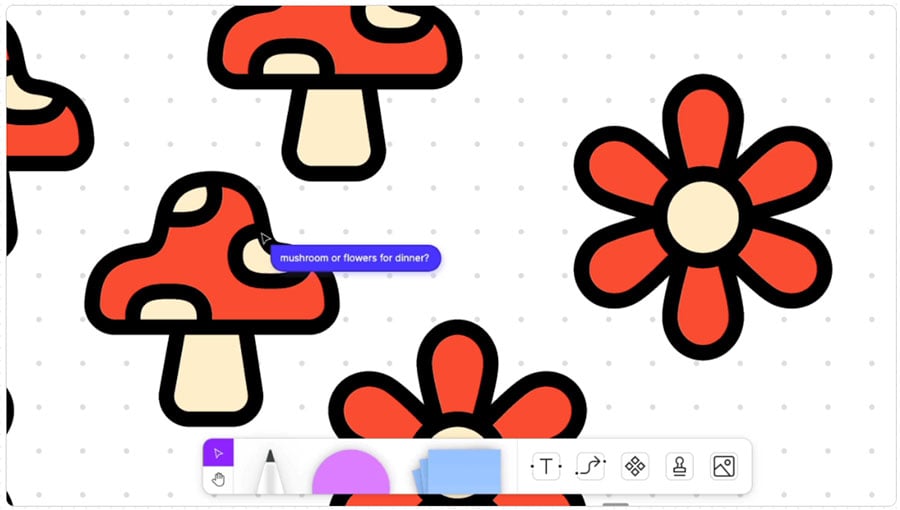
For instance, FigJam features a ‘cursor chat‘ function that enables real-time communication by clicking on a cursor, which then opens a chat window for users to exchange messages directly within the design file.
I also really like FigJam’s audio message feature, which lets users leave voice notes on a whiteboard. This can be incredibly useful for conveying more nuanced feedback, or instructions that might be cumbersome to type out.
Overall, both whiteboard tools are extremely good. Canva gets the win when it comes to kicking off your whiteboard sessions with a bigger choice of pre-designed templates, but Figma is stronger where whiteboard ‘zoomability’ and enhanced collaboration tools are concerned.
Presentation tools
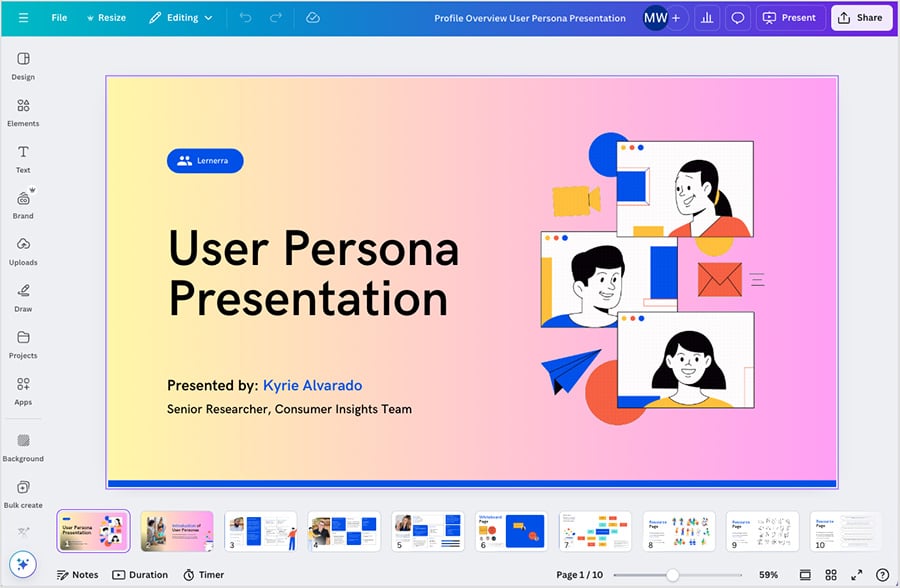
Until recently, Canva had a distinct advantage over Figma because it included a tool for creating presentations and slideshows, while Figma did not.
However, Figma has just launched a dedicated slideshow maker called ‘Figma Slides’.
Both Canva and Figma’s presentation tools allow you to design slides, use pre-built templates, add speaker notes and present your slideshows in a polished manner.
Canva once again has a big edge when it comes to the quantity of templates on offer, however — it provides 20,000+ presentation templates, while Figma restricts you to around 300.
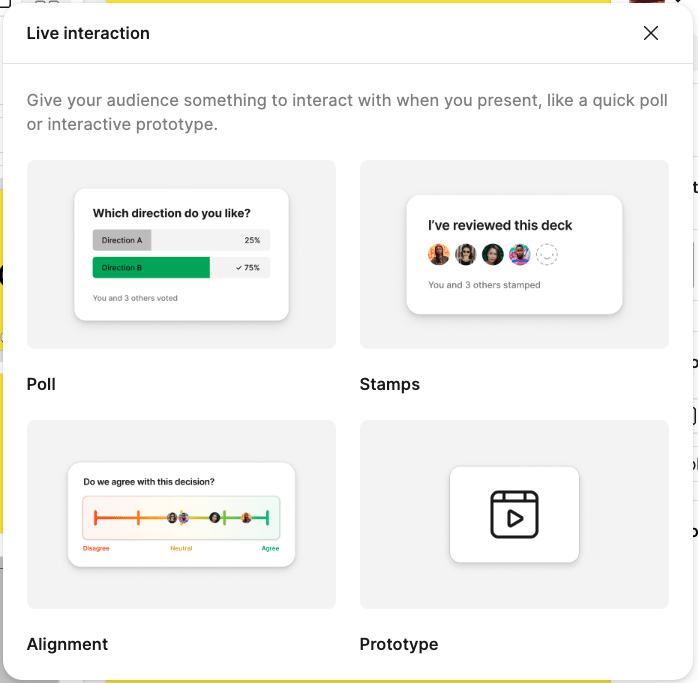
Figma’s new ‘Slides’ feature includes some promising interactive capabilities, such as live polls and clickable prototypes. Additionally, users can add interactive elements like stamps and annotations, making presentations more dynamic and participatory.
However, as it stands, Canva’s presentation tool is the more fully-fledged of the two. It allows you to add a range of sound effects (claps, drumrolls, etc.) to your slides, and it also features a built-in video recording feature for creating narrated presentations.
Another useful aspect of Canva’s presentation maker is the way it lets you use the Canva smartphone app as a remote control for your presentation. This is perfect for managing your presentation from anywhere in the room.
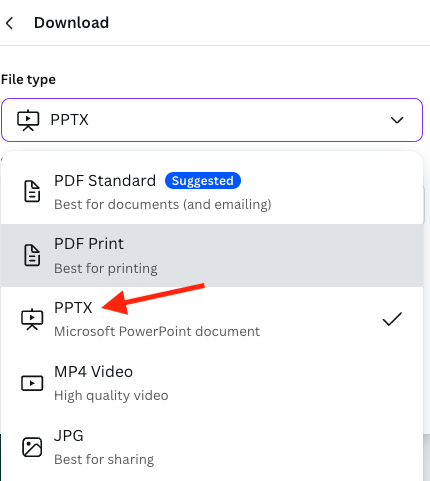
Finally, Canva is better for exporting your slideshow, because it lets you natively export to Powerpoint (PPTX) format. In Figma, this can’t be done without the aid of a plugin.
So, all in all, when it comes to creating and delivering presentations, Canva wins.
(If you’d like to see how Canva’s presentation features stack up against the industry standard Microsoft PowerPoint app, check out our detailed Canva vs Powerpoint comparison here; or, for a quick overview, watch our Canva vs Powerpoint YouTube video below.)
Apps and integrations
You can extend the built-in functionality of both Canva and Figma by adding extra features and tools to each platform via third-party apps and integrations.
Figma has the edge over Canva in terms of the overall number of integrations available, however.
The Figma plugin directory contains more than 1,800 different plugins, while around 940 apps are available for Canva.
The apps and plugin collections available in both Canva and Figma are nicely tailored to the two platforms’ userbases.
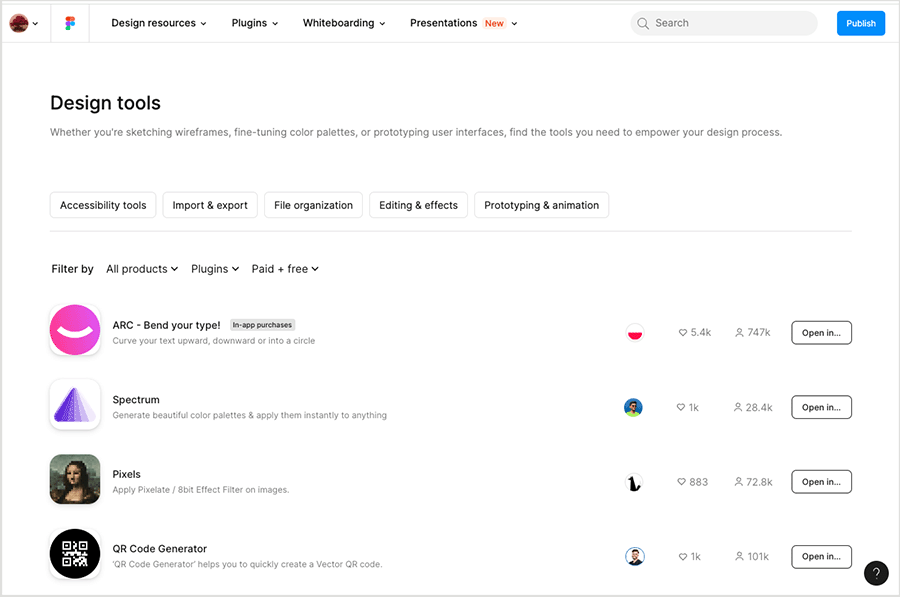
Figma’s plugins enhance its technical design and prototyping capabilities, and cater well to professional designers and collaborative teams. The plugins on offer include tools for advanced vector manipulation, animation and interactive prototyping.
Collaboration workflows are improved with plugins like Zeplin for seamless design handoff and Trello for project management integration.
In addition to its robust design and prototyping plugins, Figma also offers integrations with popular website builders like Shopify, Wix, and Webflow. These plugins streamline the process of transferring designs from Figma to live websites; and they are particularly good at helping web designers bridge the gap between design and implementation when working on ecommerce and business websites.
Canva’s apps mainly focus on enhancing your ability to create visually appealing content quickly and easily.
For instance, the Pexels and Pixabay plugins provide vast libraries of free stock photos directly within Canva; and the ‘SmartMockups’ plugin allows users to create high-quality mockups of designs in various contexts.
Canva’s app library is particularly well stocked with AI image generation apps. Key options here include Canva’s own ‘Text to Image’ app, Open AI’s ‘Dall-E’ and Google’s ‘Imagen’ image generator.
Quite a few Canva apps help you import content from other apps into the platform. You can connect Canva to services like Google Photos, Google Maps, YouTube, and Facebook, easily incorporating content from these platforms into your designs (or where applicable, exporting Canva designs to them).
But on the whole, thanks to its much bigger plugin offering, when it comes to apps and integrations, it’s probably a win for Figma here.
Mobile apps
Both Figma and Canva provide you with mobile apps (in both iOS and Android format).
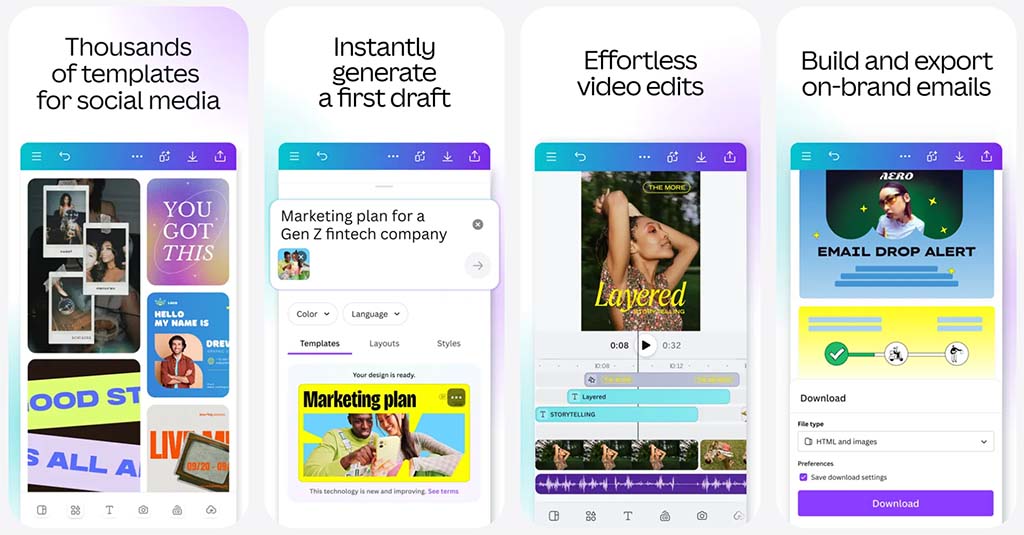
Canva’s mobile app experience is extremely close to the desktop version. Users can create new designs from scratch, access Canva’s vast library of templates, images, and fonts, and use pretty much all of the platform’s main features.
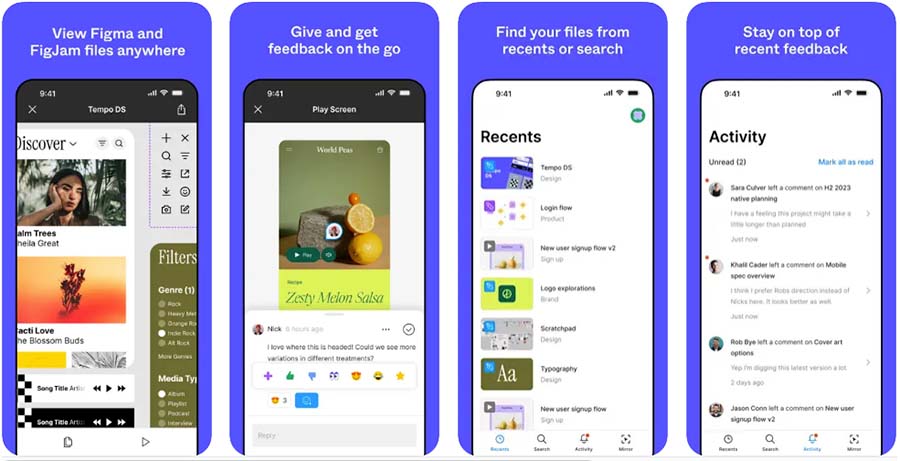
Figma’s app, by contrast, is much more limited in nature: you can’t create or edit any designs with it. Instead, its primary function is to let you and your team view projects that have already been created on the desktop version, stay updated on project changes and contribute feedback from your mobile device.
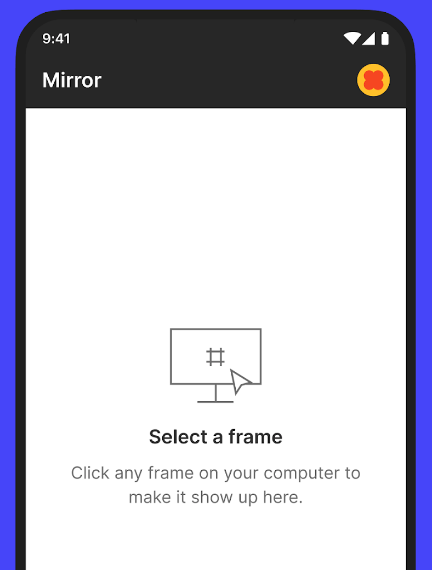
The Figma mobile app does have one really useful additional feature however: its ‘prototype mirror’ function. This lets you select a Figma frame of a project you’re working on (e.g., a page of an app interface) in the desktop version of the tool, and then ‘mirror’ the frame to your phone via the app. This lets you see exactly how your design will appear on an actual device.
By using the mirror feature, you can ensure that your layouts, typography, and interactions look and function exactly as intended on different screen sizes and resolutions.
I found both Canva’s and Figma’s apps to be very easy to use, with my one caveat being that Figma’s app started to get a bit laggy when I tried to access Figma projects containing a large number of individual frames.
As for user reviews, Canva ekes out a slight win among iOS users, scoring 4.9 out of 5 in the Apple App Store, beating Figma’s 4.6 score. Canva also takes the win among Android users, with a rating of 4.8 of 5, while Figma scores 4.4 stars out of 5.
Overall, while Figma’s app is good for staying in the loop on team projects and accessing some useful workflow tools, the winner in the mobile app department is arguably Canva, since it gives you access to the same comprehensive set of features you get on the desktop version.
Pricing
Canva offers 4 pricing plans. These are:
- Canva Free — $0 per month
- Canva Pro — $15 per month (for one user)
- Canva Business (formerly Canva Teams) — $20 per month per user
- Canva Enterprise — negotiable pricing
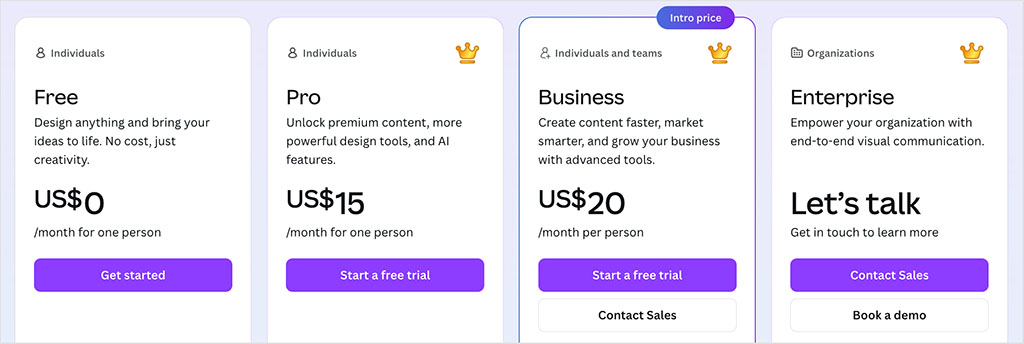
If you pay for your Canva plan on an annual basis, a discount of 16% is applied.
Some of the key differences between Canva’s pricing plans are:
- You can only add extra users to your account on the Canva ‘Business’ plan and higher.
- Pro and Business provide full access to AI tools and more generous usage limits.
- Paid plans provide access to 141+ million stock photos, videos, and graphics; the free plan offers 4.7M+ photos and graphics, but no videos.
- Paid plans allow between 5 and 1,000 brand management kits depending on your plan; the free plan offers one.
- You can only export PNG files with transparent backgrounds on the paid plans.
Related resource: read our Canva Pro vs Free article for further information on the key differences between Canva plans.
Figma provides 4 main pricing plans:
- Starter — Free
- Professional — $16 per full seat/month
- Organization — $55 per full seat/month
- Enterprise — $90 per full seat/month
You can save 20% on these fees if you opt to pay annually for your Figma plan.

As you can see from my screenshot of the Figma pricing table above, Figma’s pricing model assigns users one of four seat types: ‘Full’ seats give complete access to all products, including Figma Design, Dev Mode, FigJam, Figma Make, Figma Sites and Slides; ‘Dev’ seats are tailored for developers, offering full Dev Mode access but view-only rights in Design; ‘Collab’ seats allow full use of FigJam and Slides, with view-only access to Design files; and View seats, which are free, permit viewing and commenting across all file types.
The key differences to note between Figmas’s 4 main plans are as follows:
- You can only create up to three Figma design files on the ‘Starter’ plan; to unlock unlimited files and projects, you’ll need to upgrade to a paid plan.
- You can publish team-wide design libraries on the ‘Professional’ plan or higher; these become organization-wide on the ‘Organization’ and ‘Enterprise’ plans, with access to shared fonts and centralized asset management.
- You can only create and manage multiple teams if you’re on the ‘Organization’ or ‘Enterprise’ plan — the ‘Professional’ plan supports just one team.
- You can only create custom team workspaces if you’re using the ‘Enterprise’ plan.
- You can build and share private plugins and widgets on the ‘Organization’ and ‘Enterprise’ plans — these features aren’t available on lower tiers.
- You get access to advanced security and admin tools (like SSO, SCIM provisioning, and audit logs) by subscribing to the ‘Organization’ or ‘Enterprise’ plans — with the most extensive controls available only at ‘Enterprise’ level.
Ultimately, when it comes to pricing, Canva gets the win as the more economical — and much less complicated — choice. Its free plan doesn’t restrict the number of designs you can create, and its feature-packed paid plans are generally more affordable than Figma’s, especially where adding additional users is concerned.
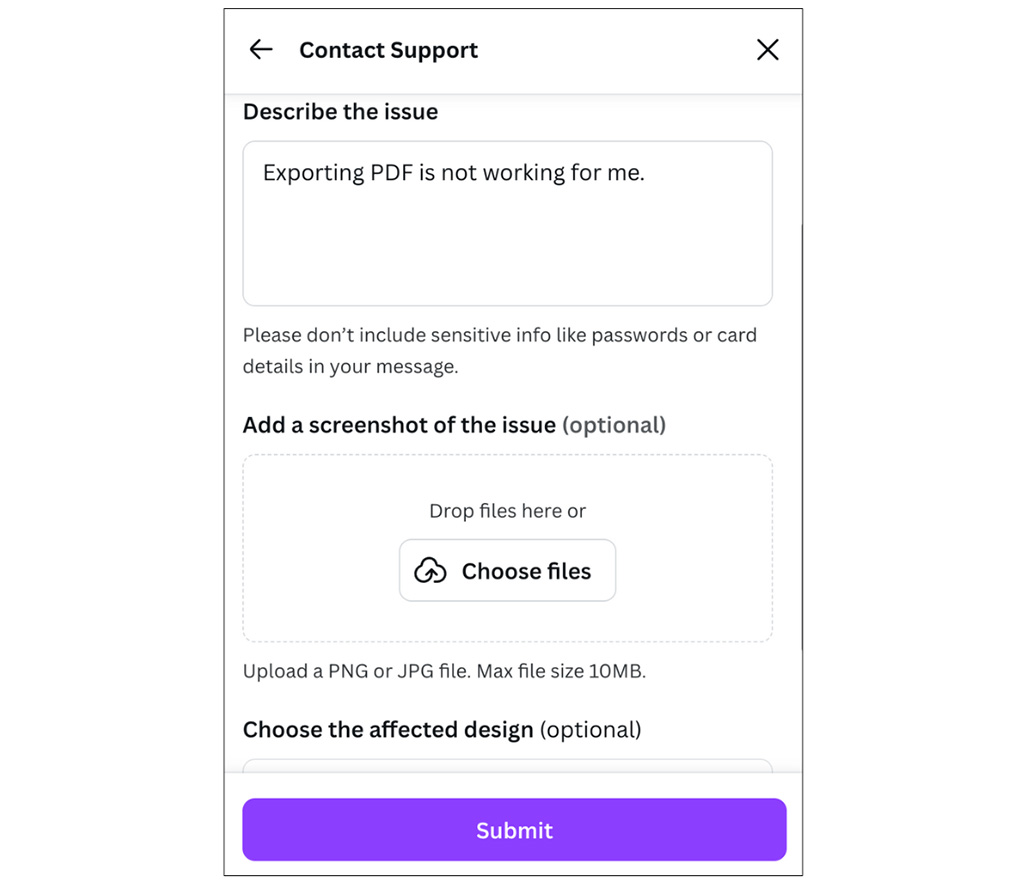
Customer support and resources
If you’re using Canva or Figma and you want to get support from a member of either support team, the only way you can do this in both platforms is via email. Unfortunately, neither company provides a live chat help service, and both platforms restrict phone support to enterprise users only.
In terms of support response times from both platforms, I found Canva’s email support team to be the quicker of the two — I received answers to my queries well inside Canva’s official response window of 24 hours.
(I also noticed that quite a few users in Figma’s community forums complain that it sometimes takes them several days to get an answer from the support team.)
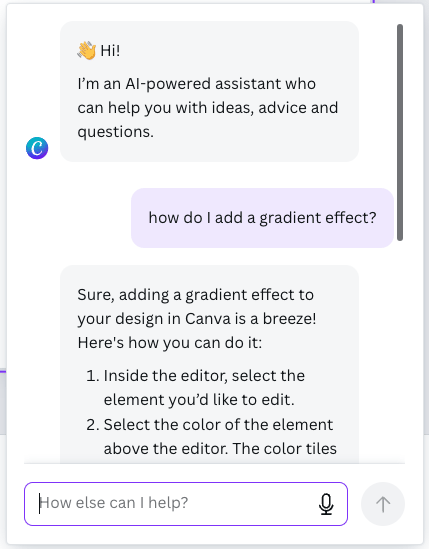
As for getting support inside the interface of both tools when you are in the middle of a project, Canva has a bit of an edge over Figma. This is because it gives you access to an AI Chatbot, which provides you with quick step-by-step solutions to whatever you are stuck on.
In Figma, by contrast, the contextual help button is effectively nothing more than a list of links and shortcuts to its various help resources (i.e., its help center, YouTube channel and email support options).
Both Canva and Figma also provide very comprehensive DIY help centers. These both give you hundreds of ultra-clear step-by-step articles and video guides to just about every single feature and tool in both platforms.

The one annoying thing about Figma’s help center is that quite a few of these articles refer to the previous version of Figma’s design interface, not the latest ‘UI3’ version of the platform.
So overall, Canva takes a slight win in the customer support department thanks to its faster response times and more streamlined contextual interface support.
User reviews
Up to now, I’ve shared my take on how Canva and Figma stack up — but it’s also worth checking how other users rate each platform in practice. The table below shows their scores across some of the main software review sites.
| User reviews site | Canva | Figma |
| G2 | 4.7/5 (6,560 reviews) | 4.6/5 (1,817 reviews) |
| TrustRadius | 9.1/10 (2,007 reviews) | 9/10 (1,588 reviews) |
| Capterra | 4.7/5 (13,119 reviews) | 4.7/5 (844 reviews) |
| GetApp | 4.7/5 (13,100 reviews) | 4.7/5 (844 reviews) |
| Average score (out of 5) | 4.66 | 4.63 |
As you can see from my table above, both tools are clearly very well regarded by their users, with only a fraction separating their average scores. In short, you’re unlikely to go wrong with either Canva or Figma from a user satisfaction point of view.
Canva vs Figma: conclusion
In conclusion, both Canva and Figma are two high-quality design platforms, each serving different audiences with distinct needs.
Canva stands out as an all-in-one design platform that’s user-friendly and accessible; it’s ideal for non-designers who need to create polished visuals quickly. With its vast template library, extensive stock assets, and affordable pricing, Canva is an excellent choice for anyone needing to produce professional content without a steep learning curve.
Figma, by contrast, is a much better fit for professional designers and teams working on complex UI/UX projects. Its advanced design tools, like vector networks and responsive layouts, make it indispensable for those requiring precision and control. Figma also excels in collaboration, offering superb real-time teamwork features.
At the end of the day, the choice between Canva and Figma will depend on your project needs. As ever, it’s always a good idea to try the platforms you’re considering out before deciding, and you can access free trials of both below:
I’ll leave you with a quick summary of the reasons I’d personally use Canva over Figma and vice versa — and if you have any queries, do make sure you leave them in the comments section below.
Canva vs Figma — pros and cons summary
Reasons I’d use Canva over Figma
- Its interface is considerably easier to use and better suited to design novices.
- It provides access to millions of free and paid templates, making it ideal for quick design work.
- It includes over 141 million stock photos, videos, and graphics — far more assets than Figma provides.
- It gives you access to better built-in photo editing tools, including background removal and AI-enhanced features.
- Its comprehensive mobile app provides full design capabilities on mobile devices.
- Canva is generally cheaper than Figma, especially where multi-user work is concerned.
- Its presentation maker tools are considerably stronger than the Figma equivalents.
- Its pricing model is more straightforward than Figma’s.
- It provides faster customer support, including quicker response times and AI chatbot assistance.
Reasons I’d use Figma over Canva
- It is a much better choice than Canva for professional UI/UX design, and perfect for complex web and app design projects.
- Figma offers much more advanced design tools than Canva, including precision features like vector networks and variable fonts.
- Unlike Canva, it allows you to create interactive, detailed prototypes, enhancing design workflows.
- It has a more extensive plugin ecosystem.
- It provides a higher-performance interface with fast response times, even on complex projects.
- It offers customizable design elements with reusable components that can be updated globally across projects.
Alternatives to Canva and Figma
Alternatives to Canva
Visme is a widely used graphic design app tailored for non-professional designers. It offers many of the key design tools found in Canva, and it also provides you with a unique form builder that lets you add animated characters to your sign-up forms.
For a more in-depth look at how Visme compares to Canva, check out our detailed Visme versus Canva comparison.
Another alternative is Adobe Express, a relatively recent addition to Adobe’s suite of graphic design and multimedia tools. Adobe Express is priced similarly to Canva and also offers a free plan (along with free access to its pro plan for educators and charities). It provides a vast array of templates, stock images, a video editor, a color palette tool and more.
To see how Adobe Express measures up to Canva, you can read our comprehensive Adobe Express versus Canva comparison here.
Kittl is another tool worth considering — it places more of a focus on typography and vintage design than Canva and Figma, but can still be used in many similar ways. You can learn more about the platform in our Kittl review and our Canva vs Kittl comparison.
For those requiring more advanced photo editing capabilities than Canva offers, Adobe Photoshop stands out as the obvious choice as a Canva alternative. Although Photoshop is a more technically demanding platform with a steeper learning curve, it’s an excellent tool for assembling visual assets. Its robust editing tools can be applied to a wide range of visuals, not just photographs.
For a detailed exploration of the pros and cons of Photoshop in relation to Canva, read our full Canva vs Photoshop comparison here.
Alternatives to Figma
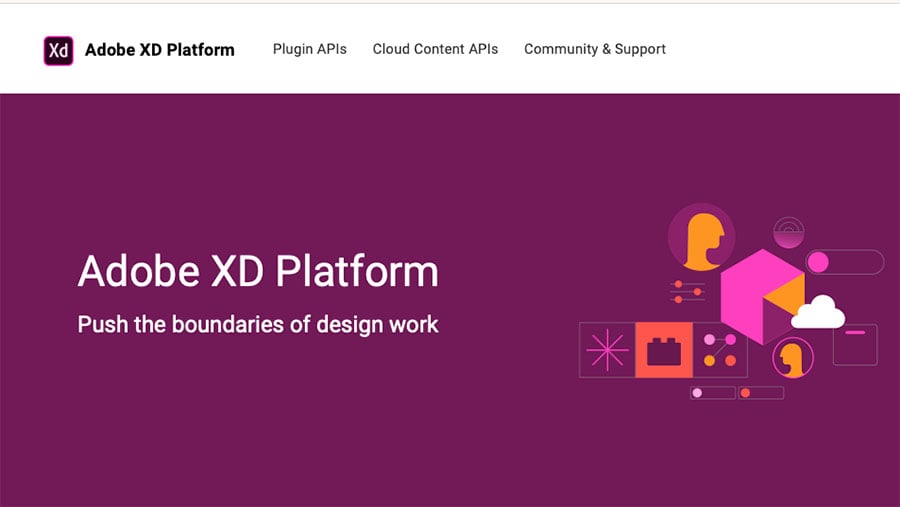
Adobe XD is a top alternative to Figma, available as part of Adobe’s Creative Cloud suite. It provides efficient workflows with tools like Photoshop and Illustrator and offers a set of design and prototyping features that are similar in nature to Figma’s.
Sketch is another popular alternative to Figma, especially for macOS users. A standalone app, it provides a streamlined interface and essential design and prototyping tools. Its extensive plugin ecosystem enhances its flexibility, making it a strong choice for individual designers and teams alike.
InVision is another key alternative to Figma. It integrates seamlessly with other InVision tools, like InVision Cloud and Freehand, and supports an efficient design-to-collaboration workflow. Its key features include an advanced animation maker and responsive design tools.
Update details
This article was updated on January 7, 2026. The following updates were made:
- The user reviews section was updated.
- Product screenshots were updated.
- The number of apps available for both platforms were updated.
- The quantity of templates available in both platforms were updated.
- App store scores were updated.
No comments