
Whenever we create a Squarespace website for a client, we use a comprehensive launch checklist to ensure that the build process goes smoothly — and that the quality control process is robust. And in this post I share that checklist with you.
Even if you don’t create websites for other people — and simply want to build your own Squarespace site in the best way possible — you’ll find a lot of value here.
Pre-build steps
1. Get a client brief
The first thing we do when building a Squarespace site for a client is to ask them to fill out a briefing form. This contains all the key questions about the project that we need answers to, including:
- What kind of site they need (ecommerce, informational etc.)
- How many pages are going to be on the site
- What the branding requirements are.
We then follow this up with an information-gathering session to clarify any queries we may have on the brief, and negotiate a price for the project.
One thing we are very keen to get at this stage is a full set of brand guidelines. If the client doesn’t have any in place, we usually recommend that they create some before proceeding with the project — either using their designer or one of ours.
2. Sign a contract
Once we’ve got a clear sense of the client’s requirements, the next thing we do is ask them to sign a contract outlining the scope of work (and the associated fees). This ensures that both we and the client know exactly what to expect from a delivery and pricing point of view, and that there’s no ‘mission creep’ to worry about during the project.
For this, we use a reusable contract drafted by a professional lawyer, but there are various free templates you can access online that may suffice for your needs (it’s best to use a legal professional here if you can, however).
One thing that it’s really important to specify in the contract is how many rounds of feedback and changes are going to be involved in the project. This will help you avoid an open-ended review process — and endless tweaks to a site!
3. Collect assets
The next step in our build process is to collect any necessary assets for it.
These typically include:
- the site map
- text
- images
- videos
- web fonts
- social media handles
- privacy policy
- website terms and conditions
- cookies notice.
In fact, when it comes to the collection of these assets, we have a golden rule: we never start building anything until ALL the final content (text, images and videos) has been supplied — and we make this very clear to clients at the outset of any Squarespace project.
Doing so ensures that we don’t waste time with any to-and-fro discussions regarding missing content, and it lets us build the site more quickly.
4. Gain access to relevant accounts
The next thing we do is ask for access to any accounts necessary for the build and go-live.
Typically we ask for access to:
- social media accounts (Facebook, LinkedIn, X etc.)
- domain name provider accounts (GoDaddy, Namecheap etc.)
- email marketing tool accounts (Mailchimp, GetResponse, AWeber etc.)
- the Squarespace account for the build (if the client already has one — if they don’t, we create one on their behalf, using their company and credit card details rather than our own).
It’s important to note however that we generally don’t ask clients to share login details for these. Rather, we ask them to add us as users instead — this is much better from a security and accountability point of view.
5. Perform basic keyword research
Keyword research is the process of identifying queries (‘keywords’) that people enter into search engines when looking for particular products or services.
Knowing what these are, and adding them to the appropriate parts of a website, can make it much more likely that the site in question will generate traffic (and by extension, sales!).
How far you want to go down the rabbit hole of keyword research is up to you (and dependent on a client’s budget), but we typically do a bit of this at the outset of each project. This is because in 99% of cases, the client doesn’t have a precise understanding of what keywords are most aligned with their products and services, and by identifying them, we can add a lot of value. Even some basic research can, in time, yield very positive results and generate valuable traffic.
Check out our guide to keyword research for help with this process, or watch the video below.
Build stage steps
With our brief, contract, assets and account access all sorted, we then move onto the build stage. Here’s what we do during this:
1. Review content and site map
Before we start creating the Squarespace site itself, we take a look at the quality of content that the client wants us to put on it.
Although technically they can ask us to upload anything they like to it — and are totally within their rights to do so — in most cases the supplied content benefits from a second pair of eyes going over it.
We’ve encountered many situations where text is too short, too long, or irrelevant; and the images supplied are cheesy — and highly inauthentic — stock photos. Accordinglly, we sense check the client’s content carefully and make recommendations for improvements where necessary.
Similarly, we often find that a client’s preferred navigation setup isn’t very user friendly; again, we suggest improvements before getting stuck into any page creation within the Squarespace interface.
2. Choose a template
We then choose a Squarespace template for the project. This can sometimes be done in consultation with the client, or we may build one from scratch using Squarespace’s ‘Blueprint’ feature.
Generally speaking, we go for something simple enough, because we want to be able to apply the client’s brand guidelines to it easily (more on that in a moment).
3. Delete sample Squarespace pages
Squarespace templates typically come pre-installed with a bunch of sample pages. We usually delete these at the outset of the build, so that there’s less risk of the site going live with dummy content that might either look bad — or end up being indexed by Google and surfaced in search results.
4. Adjust site settings to ensure client’s brand guidelines are met
We then set up the basics of the Squarespace site in a way that ensures that the client’s brand guidelines are met.
This involves:
- creating a site-wide color palette in Squarespace that reflects the client’s brand colors
- setting up fonts so that the brand ones are the defaults for headings, paragraphs, quotes etc.
5. Ensure images are correctly sized
Squarespace recommends a width of between 1500 and 2500 pixels for any images you upload to a site, and a maximum file size of 500 KB. However, clients often give us images that are considerably larger than that (both in terms of width and file size), so we spend some time checking them all carefully and resizing where necessary.
6. Link social media accounts
We then use Squarespace’s ‘social links panel’ to add any social media icons to the site. Doing so means that whenever we use the Squarespace social links block on the site, the right profiles will appear.
If the client wants to push content to social networks using their site, or embed feeds from them on their site, we will also connect these networks directly to Squarespace (where applicable or possible).
7. Create site navigation
We’ll then create the site’s navigation, ensuring that it is as user-friendly as possible, and that the pages within it contain appropriate keywords.
8. Add content to the site
With our site template chosen and its settings nicely configured to match the client’s branding, we then add the content. We do this in a way that is as SEO-friendly as possible, punctuating the client’s text with keyword-rich headings. With images we always make sure that alt text is added correctly too.
(You can read our Squarespace SEO checklist for more tips on how to do both).
9. Add a favicon to site
It’s an easily-overlooked step, but adding a favicon to a Squarespace site is important. A favicon is the small image that represents a website in your web browser tab and search engine result pages.
Adding a favicon to your Squarespace site:
- presents a professional and consistent brand image
- helps your users locate your site when they have multiple browser tabs open
- makes your site stand out in search results.
You can create a favicon easily in graphic design tools like Photoshop or Canva — see our guide to creating Squarespace favicons for more details on how to do this.
If you don’t add a favicon to a Squarespace site, users see the standard Squarespace cube icon, which doesn’t look great.
10. Add a mailing list sign-up form to each page on the site
Assuming the client is happy with this, we then add a mailing list sign-up form to each page on the Squarespace site. This is because we are firmly of the view that email is one of the best and most profitable marketing channels open to businesses, and there is usually a strong correlation between business growth and mailing list size.
This can either be done via embedded forms, or pop-ups (although if using the latter, read Google’s advice on using them in a way that doesn’t hurt you in search first).
We usually encourage our clients to consider using a ‘lead magnet’ to generate signups — i.e., to incentivize subscription via a resource or product sample that is only available on the mailing list. You can check out our guide to growing an email list for tips on how to go about doing this effectively.
We also encourage clients to create an autoresponder sequence that kicks in when users sign up to the mailing list. These are e-newsletters that are sent automatically to subscribers on your mailing list, triggered by rules and time intervals that you define.
So for example, you could send your subscribers a welcome email automatically, followed by an encouragement to buy a particular product, followed by an invitation to join a Facebook group etc.
11. Add a ‘contact us’ call-to-action on each page
In most case, the key aim of having a website is to drive enquiries and leads. I’ve discussed how we maximize lead generation by adding mailing list sign-up forms on most pages of our clients’ sites; the other thing we do on this front is ensure that there is a ‘contact us’ call-to-action on as many pages as possible. (By this I mean adding a link or a button that takes the user to the site’s contact page).
12. Set up customer notification emails correctly
If the client has commissioned us to make an online store, we spend some time configuring the standard Squarespace customer notification emails so that they accurately reflect the client’s fulfillment process and refund policy.
13. Create legally required pages
We then ensure that all the necessary ‘legal’ pages are present on the site. What these are will vary according to your jurisdiction and offering, but you’ll usually need to create pages containing:
- website terms and conditions
- a privacy policy
- a cookies notice
- a refund policy (if you’re creating an ecommerce site).
If your client hasn’t supplied you with these, I’d suggest that — budget permitting — you ask them to get a lawyer to draft them. If that’s not an option, there are various services available online that let you buy templates for the above types of pages, which your client can then adapt to suit their needs.
14. Ensure that the site is GDPR compliant
With the EU’s introduction of General Data Protection Regulation (‘GDPR’), business owners have to follow strict rules on how they process personal data (similar rules apply if you’re in California, via the California Consumer Privacy Act or CCPA).
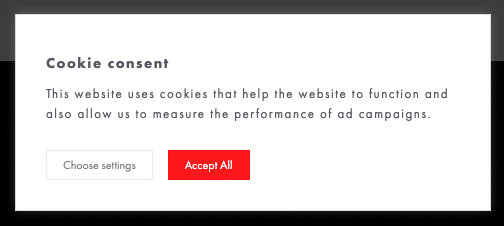
These rules involve capturing and storing data in a way that respects personal privacy, and not dropping cookies without consent. You can read our Squarespace GDPR guide for more details on how to meet these requirements.
While you’re here, get some free web design resources
For a limited time only, we’re offering our readers some excellent free tools. Sign up free to immediately receive:
- our SEO, blogging and ‘how to start a business’ cheatsheets
- extended free trials and discount codes for essential business apps
- our online store comparison chart
- a downloadable cheatsheet on how to create an online store
- our latest tips on web design, ecommerce and growing a business
Feedback collation and implementation
At this point, we’re in a position to get the client’s take on our work, and send the draft site over to them for review.
We are very firm with clients on two points here:
- We insist that all feedback be sent in one document (this minimizes to and fro, and confusing email threads).
- We insist on sticking to the agreed number of rounds of feedback.
Once the feedback is collated and relevant changes made, we ask for final client sign off. And then we’re nearly ready to put the site live — but not before…
SEO checks
With the core work done on the site, and any client-requested changes to it made, the Squarespace site could technically be put live.
However, there are some important SEO checks that we perform before publishing it — this is to make sure that the new site has the best chance of becoming more visible in search results.
1. Check page titles
We check each page title on the site to ensure that it is SEO friendly. This means ensuring that the correct keywords have been used in it (see my point about keyword research above for more on that) and that its length doesn’t exceed 60 characters.
2. Check meta descriptions
Meta descriptions are short descriptions of pages — often surfaced in search engine results pages — that can help users and Google understand more about the content contained on them. They should ideally contain the target keyword for the page, and be 160 characters or less in length.
As part of a Squarespace build we check that the meta description field for each page has been properly completed.
3. Check alt text
Alternative text (‘alt text’ for short) is a text-based description of an image; it helps search engines and visually impaired users understand what that image is depicting.
So before going live, we look at the image settings for each picture on the Squarespace site, and ensure that none of them are missing alt text.
4. Set up 301 redirects
If the site we’re building for a client was previously hosted on another platform (WordPress or Shopify etc.), and we’ve changed some of its URLs during the Squarespace build, we add redirects from the old URLs to the new ones. This lets Google know the location of the new pages and can prevent the client losing search rankings after a migration.
(Note: because Google can be a bit funny with URL changes, we actually don’t change them during a migration to Squarespace unless it’s absolutely essential to do so).
You can learn more about how to create redirects in Squarespace here.
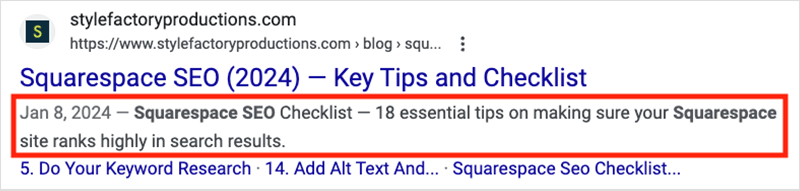
📚 Related resource: Squarespace SEO Checklist
Going live
1. Check that no pages remain password protected
During a Squarespace site build, it’s common practice to password-protect the site or certain pages of it when sharing the project with clients. Before you publish the site, ensure that any password protection that is no longer necessary has been removed.
2. Map the Squarespace site to a custom domain name
At this point, we’re ready to go live, by mapping the Squarespace site to the client’s domain name.
If the client has purchased a domain via Squarespace, this is easily done in the Squarespace dashboard.
If the domain has been bought from a domain name provider, it’s a case of logging in and changing the domain name settings (DNS) manually.
Post go-live QC tasks
So the Squarespace site is now live! But there are a few important post go-live QC tasks to complete before we’re entirely done and dusted.
1. Check the site is appearing at correct domain name
We check that the site is appearing as expected at the right domain name, and with a valid SSL certificate (having the latter means that the ‘https://’ version of the site is accessible).
⚠️ Note that Squarespace takes a few hours to enable SSL properly, and until it has done so, you may see a warning in your browser when you access the site, stating that it is not yet secure. If you do, check the site again a little while later to see if the issue has been resolved — it’s usually a temporary one.
2. Check the site on multiple browsers and devices
We also test the live site on a variety of different browsers, using tools like BrowserStack (which shows you how a website appears on a variety of screen sizes). We also check it across multiple devices and operating systems.
3. Test forms
We then test all forms on the site to ensure that mailing list signups are being received okay, and that contact forms are sending enquiries to the correct email address.
4. Perform test transactions
If we’ve built an online store for the client, we perform test purchases to ensure that payment for goods is being received okay, and that the right notification emails are being sent.
Similarly, if we’ve used Squarespace to create a paid-for member’s area, we’ll check that this aspect of the site is working as expected too.
5. Install an analytics tool
Although Squarespace has its own analytics feature, it’s rather basic in nature. So we tend to add Google Analytics and Fathom Analytics to most client sites — the former being good for capturing a lot of detail on site visitors, and the latter better for getting a true picture of the number of people accessing the site.
(For GDPR-related reasons, Google Analytics can only be run after a site visitor has consented to cookies being dropped; this means that users who don’t do this won’t necessarily be counted. Fathom Analytics, being cookie-free, counts all visits.)
6. Transfer site to client
If we’ve set up the Squarespace account for a client, at this point we’ll now add them to it and make them the owner of the site.
7. Train client on how to use Squarespace
If we’re going to be updating the site on the client’s behalf, we’ll do a training session via video call with the client on how to add and edit content in Squarespace.
8. Encourage client to add their site to Google Business
As a final step in the build process, we encourage our clients to add their new site to Google Business. This is particularly important if the client is offering their services or products to customers in a particular geographic area, as Google Business profiles can end up on Google Maps quite quickly, and help massively from a local SEO point of view.
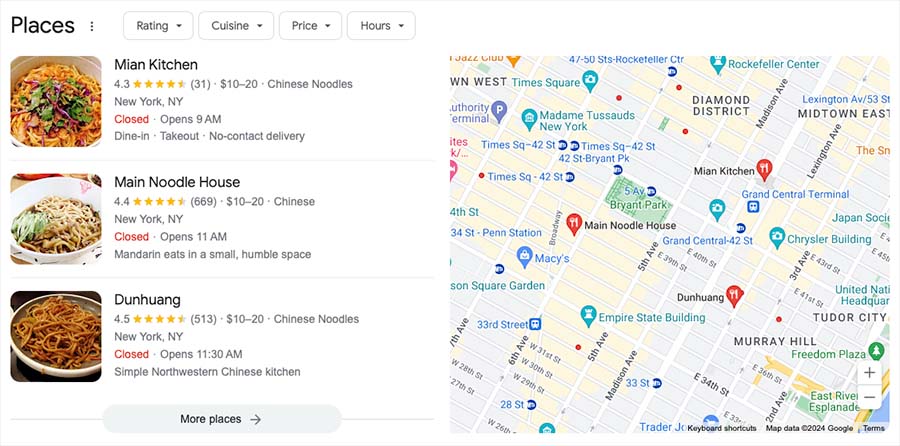
We’ll also give the client a few general pointers on how to start raising the visibility of their site.
Wrapping up /cheatsheet
I hope you’ve found this checklist helpful! Do feel free to add any feedback you might have on it (or indeed checks you perform yourself on Squarespace sites) in the comments section below. I’ll leave you with a simple cheatsheet version of this article, which gives you a quick overview of all the steps and checks outlined in this article.
Squarespace launch checklist: a cheatsheet
Pre-build stage
- Get a client brief
- Sign a contract
- Collect assets
- Gain access to relevant accounts / tools
- Perform basic keyword research
Build stage
- Review content and site map (and suggest improvements)
- Choose a Squarespace template
- Delete sample Squarespace pages
- Adjust site settings so that the template complies with brand guidelines
- Ensure images are correctly sized
- Link social media accounts
- Create site navigation
- Add content to site
- Add favicon to site
- Add mailing list sign-up form to relevant pages
- Add ‘contact us’ call-to-action on each page
- Set up email notifications
- Create legally required pages
- Ensure that the site is GDPR compliant.
Feedback stage
- Collate feedback (in one document)
- Make necessary adjustments
- Go through agreed rounds of feedback
SEO checks
- Check page titles are correctly configured
- Check meta descriptions have been added to each page
- Check that all images have alt text
- Setup 301 redirects if necessary
Go-live
- Check that no pages remain password protected
- Map Squarespace site to custom domain name
Post go-live QC tasks
- Check site is appearing at the right domain
- Check site on multiple devices and operating systmes
- Test forms are working properly
- Perform test transactions
- Add analytics tools
- Transfer site to client
- Train client on how to use Squarespace
- Add site to Google Business.
No comments